|
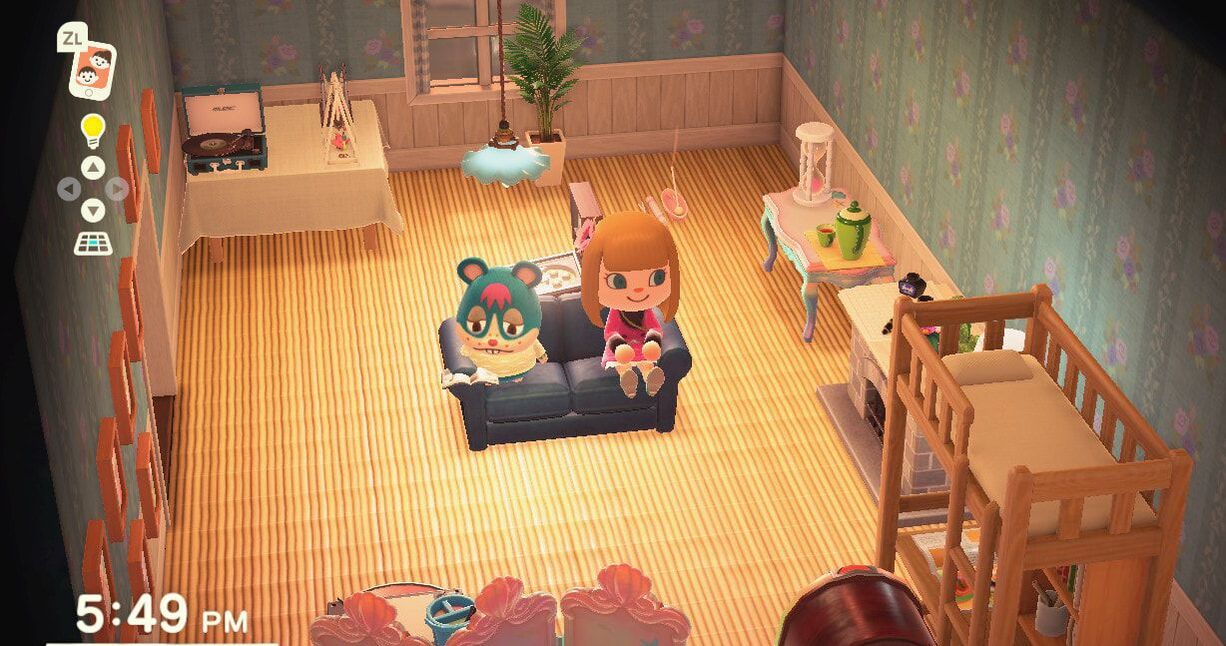
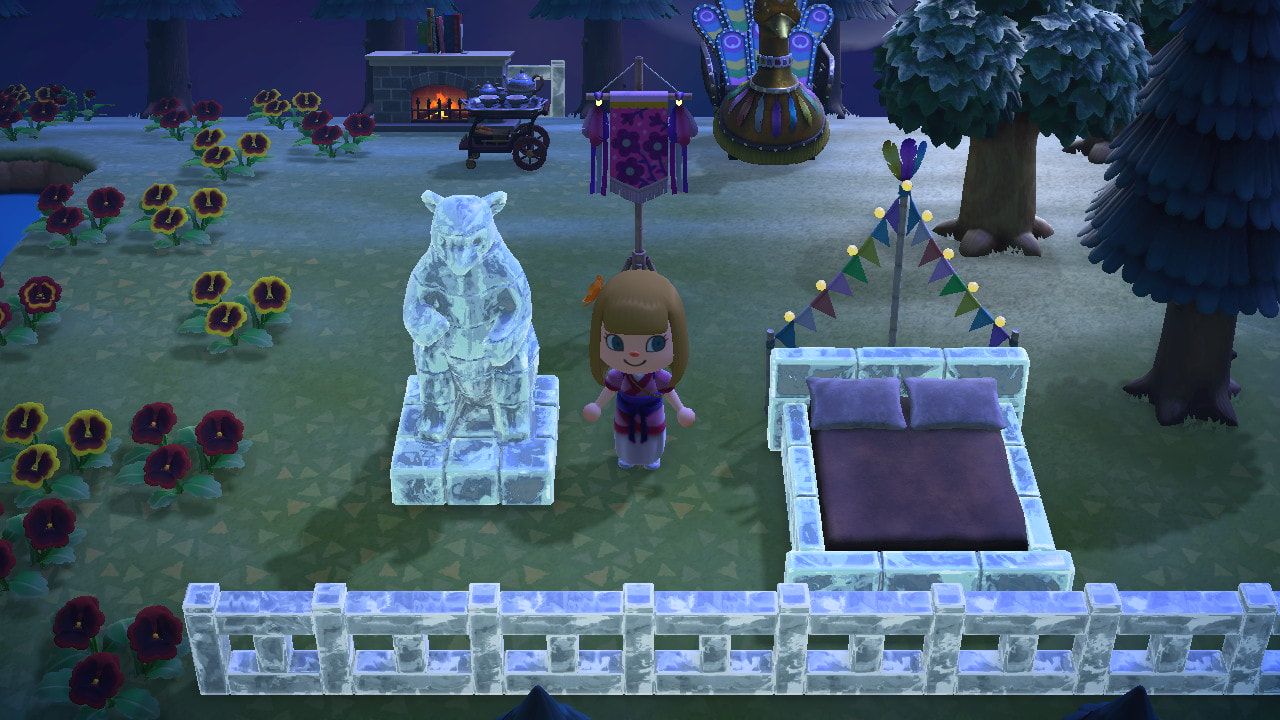
I hate to spoil things for any player - part of the fun is discovering surprises, making mistakes, and learning from them - so I haven't given away all the secrets in this Animal Crossing guide. Still, if you're searching about it online, it's likely you have questions. If you're running around with a swollen eye second-guessing whether you should have shared that scallop, you are not alone. (If you're wondering why this strategy post is part of an educational blog, see my post about the education benefits of this game)  13 Early-Game Things I Wish I'd Known about Animal Crossing 1) You will get more inventory space in your pockets The first chance you get, use Nook Miles to get the pocket organizer (unlocks ten more spaces in your pockets), and another expansion comes along soon after that. You won't always have to stop at your house, the museum, or the Nook brothers every five minutes to put things down - it will get better. 2) Select multiple objects when selling in Nook's Cranny It took me an embarrassing amount of time to realize I didn't have to go up to the brothers and talk for each individual item - I could keep clicking on multiple things in my inventory before clicking "confirm" to select them to sell. If I can save just one person, this confession will have been worth it. 3) Get the ACNH app; re-consider the official print book By its nature, the app can be updated, while the book, which I bought four months after the New Horizons release, was already missing some villagers and information. The only benefits to the book that I found were the efficiency flower-breeding charts and information about home and island ratings. I bought the book mostly to have the creature availability (time of year/day) and sell price, but the book lists those in two separate creature lists. The app has them all together. 4) The ladder and vaulting pole won't break like other tools I was carrying extras of these to mystery islands at first, because I didn't want one to break and leave me stranded. You only ever need one of each. 5) Cover the holes with "y" After you use your shovel to dig a hole, you can press "y" to kick sand/dirt to cover the hole up again, instead of pressing "A" again to use the shovel to fill it in. Note: you can accidentally pick flowers and other objects in front of you or under you with this method, so it works better on the beach than in the woods. 6) Changing your appearance You need a mirror, which you can build when you get the DIY recipe, or buy, or receive as a gift. Place the mirror, then walk up to it and press "A" to get options. 7) Put Away Tools Fast Click the down arrow on the left side to instantly store a tool in your pocket. It's nice not to have to whack your new neighbors with a net when they run up to say hello. 8) Where the Clothes Go After You Put on Your Wet Suit Click "X" to open your pocket inventory and navigate down to the shirt icon next to the bells - it gives you the option to remove your wet suit, and then you can see your outfit again. 9) Re-Order Your Inventory Open your pockets, select and hold an item with "a," and then drag it to the slot you want using the left stick. This is useful if, for example, you like having your tools in the top row. 10) Crafting Faster If you press "A" at the workbench, you can craft DIYs faster; it's not a big time-saver unless you are making a lot of things in a row (like fish bait from a stack of manila clams). 11) Moving Furniture / Design View If you move your left stick and press "A" at the same time, you can slide furniture. You can also press "A" and rotate the stick to rotate furniture. After you upgrade to a house (from a tent), you can press the D-pad to enter design mode, which makes it a lot easier to put items exactly where you want them. 12) You Need Iron Nuggets Early On There's a challenge early in the game that requires iron nuggets and wood to craft specific items. The wood is easy to come by, but you'll need to master the rock resources (see below) daily to get enough iron nuggets. You can use a Nook Miles ticket to fly to a mystery island to collect more of these resources. 13) Animal Crossing is for Everyone There isn't one way to play this game; there are different paths of emphasis and you can take the ones that interest you most. You can collect the following in Animal Crossing: Villager Photos, DIY Recipes, Furniture, Clothing, K.K.'s Songs, Reactions, Museum Items, Gyroids, Bells and Nook Miles, and Plants. You can design the following items in Animal Crossing: Furniture, Clothing, and Pathway Patterns, Home Decor, Island Layout, Themed Island Decor If you aren't a collector or a designer, you can chat with in-game villagers, wander around the island enjoying the beach, or find a blend of all these that works for you. It's not just for kids, although it's family-friendly; there are online groups with thousands of adult players. No matter how you choose to play, the game is surprisingly addictive! 4 Things To Say "Yes" To in Animal Crossing  Digging for fossils for the museum: armchair archaeology In general, try saying "yes" to the in-game options, even if you want to resist and do your own thing at first. The game is designed to be a long-term tutorial in your first few weeks of playing, and "yes" opens up many advantages if you want to focus on collections or designs. Opting in will get you ahead in understanding game mechanics and features. 1) Villager Requests Neighbor sick? Run to Nook's Cranny and bring back some medicine. Lost item? Talk to a neighbor and get it back where it belongs. Delivery request? Take the item to the right person, and go back and tell the requester that you did it. Wharf Roach request? Collect some in advance and put them in storage to have ready when villagers ask. And maybe judge them a little, because why do they need wharf roaches? Later on, your villages will ask to play simple games with you, to come to your house, to sell items to you, and more. You might not have time to host them, and you might not want to give them every item in your pockets, but if one of your main goals is to collect villager photos, this is a fast way to build up friendship points with your neighbors. (See below for details about villagers) 2) Help Island Visitors As with any aspect of this game, if you don't have time or aren't interested, it's not required, but helping early on helps you learn game mechanics, and you get a few presents and Nook Miles along the way in exchange. Wisp: a ghost whose spirit pieces scatter and you can collect them with a net and return them to him. He will leave you an item in exchange that you can use, sell, or give as a gift. Snowboys: In winter time, if you make a perfectly formed snowboy, you'll be rewarded with a DIY recipe and a large snowflake (a recipe ingredient). If you talk to the perfectly-formed snowboy every day, he'll give you a new large snowflake until he melts. At first, kick the snowball (avoid hard surfaces or it will break apart), until it grows large enough to push. Gulliver and Gullivar: birds who show up on the beach; talk to them multiple times in a row before they wake up and need help retrieving communicator parts. For one, you dig up the pieces on the beach (like clams), and for the other, you dive for pieces (like sea anemones). Either way, a gift is mailed to you the next day. 3) Home Expansion and Island Construction It's expensive, but as soon as Tom Nook lets you build bridges and inclines, spend some bells to connect parts of your island with a bridge, and access places on cliffs with inclines. This makes life much easier early in the game, to access different flowers, trees, and fish. Villagers don't all have ladders or vaulting poles, so once the bridges and inclines go in, you'll start to see them wandering around in more places. If you like decorating, you'll love having more space to put items with the home expansion, and the opportunity to customize the exterior. The island improvements count toward your island rating, and the home expansion gives your house a better rating. 4) Donate to the Museum Blathers, the museum curator, will only take one of each kind of fish, sea creature, or insect. At first, every thing you collect will be new, but quickly, you'll have so many different things it's hard to keep track of what's donated and what isn't. You can check the Critterpedia on your Nook Miles phone, but a good system is to donate the first species every time. The first time you catch a new fish, insect, or sea creature, your speech bubble will say "Yes!" followed by "I caught a ___," and then it will say a cute phrase about it. You only see that "Yes!" the first time, so it's a helpful cue. Blathers also takes fossils, which you can dig up from star formations in the ground (new ones spawn daily on your island, and you can find some on mystery islands, too). There's no in-game advantage to tour the museum, but I was surprised at how nice the displays look, and it's fun to see them filling up. 6 Things You Don't Really Have to Do in Animal Crossing 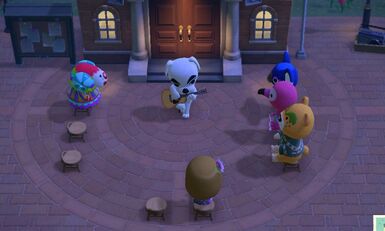 You don't have to buy a glow stick for K.K.'s concerts, but you're going to want one 1) Isabelle's Fences and Island Ratings When Isabelle shows up with her island evaluations and decorative demands, she will likely advise you to add fences. I disliked that a lot, since the freedom of running around wherever I liked was interrupted by so much fencing. However, I did want to level up to three stars to unlock terra-forming, and later to five stars, so I was tempted. Fencing is pretty easy to come by, and other decorations are more expensive, but I was able to get a five-star rating without very much fencing when I spaced decorations out across the island. If there was a nine-grid without much going on, I put something there, even furniture (like a frozen bed) that seemed more like an indoor item. I didn't order every decoration from Nook Shopping, either - I only choose the things I liked, and I had a few items that repeated (a couple of the same fountain, a couple of wishing wells, and so forth). 2) Listen to Blathers There is no in-game reward for listening to all of Blathers' informational sessions about every insect, fish, fossil, art work, and sea creature, other than the obvious educational value. There is no in-game penalty for failing to listen. 3) Exercise in the Plaza Group stretching does have benefits in the game - you can earn furniture prizes, and after fifty sessions, you learn some special reactions. Of course, if you really get up and move instead of using the button option, that's a separate benefit. Sometimes participating gives you bonus Nook Miles, too. And starting a stretching session gives you a sneak peek at any visiting characters to your island, like Celeste. Although that all seems like a case for saying "yes" to group stretching, you've got plenty of other things to do if you want to skip it. 4) Buy Turnips from Daisy Mae If you want to play the Stalk Market and sell your turnips, this is a great way to be a Bellionaire. But if you buy turnips, you have to store them, and remember to check the sell prices during the week before the week is up and they rot. If you time jump and you bought turnips, they will automatically rot, so that's another drawback. As an early player, trading in turnips was something I waited to do so I could focus on other aspects of the game. Of course, if collecting bells is your main goal (or a goal to advance your decorative dreams), this will take priority. 5) Visit Harv's Island for Pictures Eventually, assorted shopkeepers will take up residence on Harv's Island, and you might want to visit occasionally. Harv's photo studio can be a fun diversion, but there's no real in-game advantage to this, unless you find it interesting. 6) Change Outfits If you want to run around in your SCUBA suit (which, by the way, does not wear out), it's convenient for jumping in the water at any time to collect some easy bells. Villagers may comment on it when they talk to you, but you don't have to change your clothes unless you enjoy it. Later on, when Label visits the island, she will issue fashion challenges that can earn you clothing shopping tickets, so having some clothes in your storage can be an advantage for that. For some players, collecting and assembling different outfits is part of the fun of the game, especially for special occasions and for gifts. Note that for all the recommended yes and no actions here, almost all will net you some Nook Miles, whether it's immediate, over time, or indirectly. 7 Things About Fishing in Animal Crossing
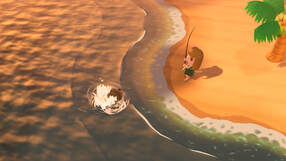
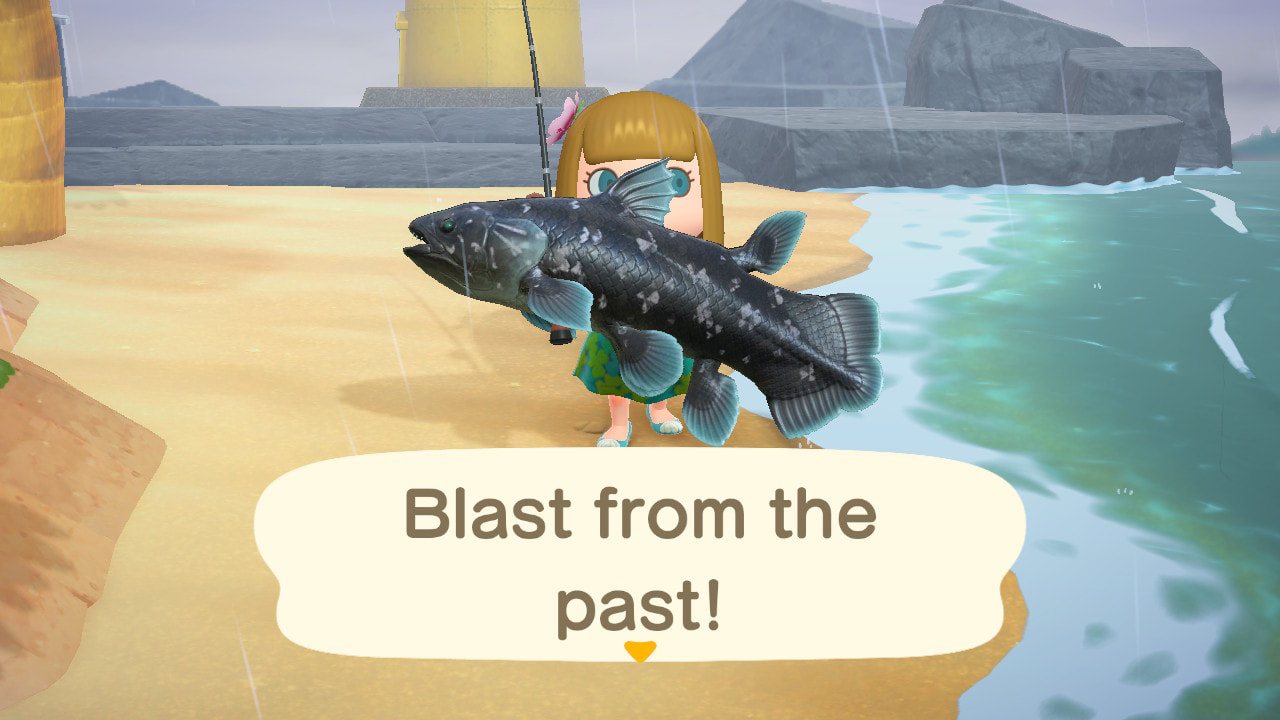
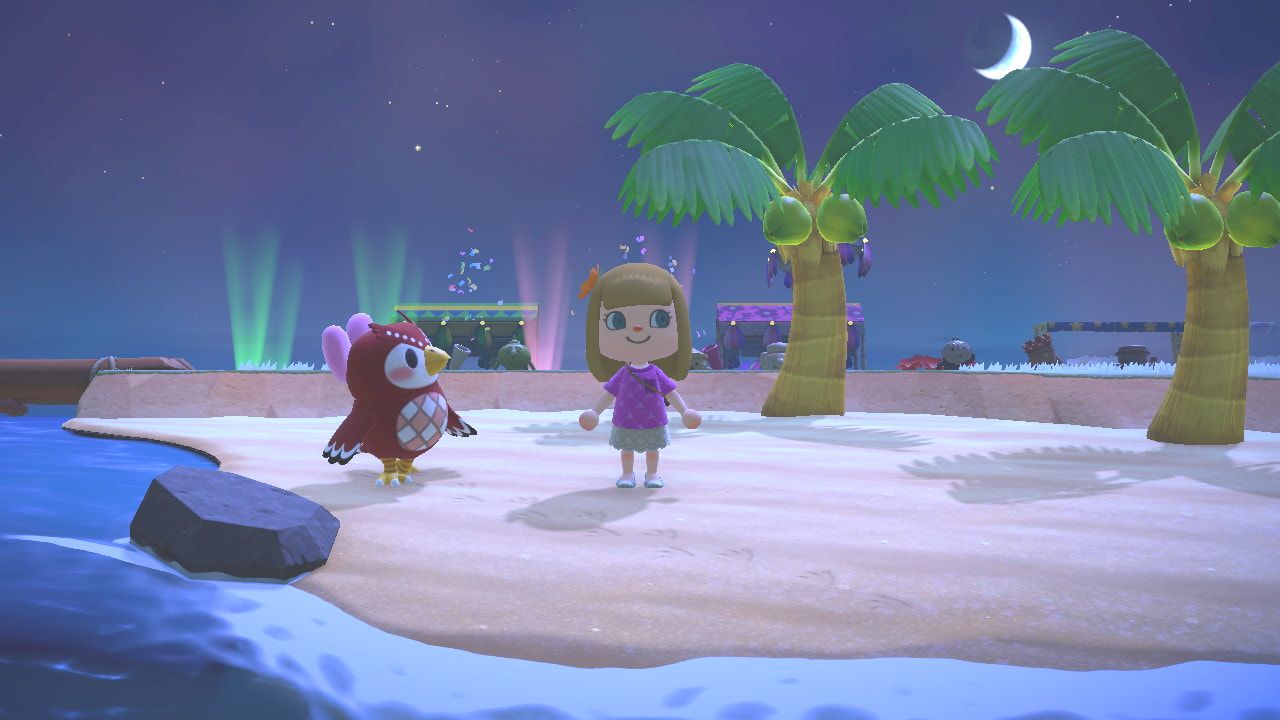
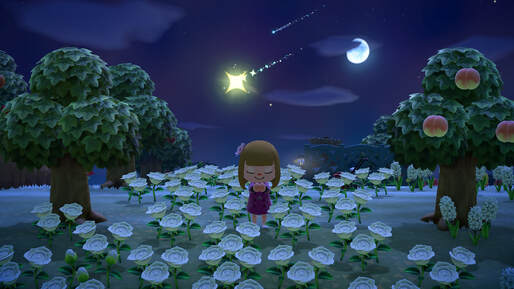
I don't fish in real life, but it is strangely really fun for me in Animal Crossing! 1) How to Fish Press "A" to cast the fishing rod when you see a shadow in the water. Fish can nibble up to 5 times before biting. The sound is the real give-away about whether it's time to click "A" to real it in - it has an extra slosh to it, while the nibbles are quieter. 2) Know Your Fish There are some valuable smaller shadow fish and some less-valuable larger fish. Some are common and some are rare, and they appear in different seasons and at different times of day (an app or list is useful if you want to keep track; you can also check the Critterpedia on your Nook phone for things you've already caught). It's smart to be aware of which ones have been donated to the museum and which ones sell for more. 3) Make it Easy to Be a "Fishionista" Don't clutter the edges of your rivers, beaches, ponds, pier, and river mouth with decorations, trees, and buildings, so you can position yourself at different angles to catch a fish wherever it appears. 4) C.J. After you get a three-star island, you'll see a visitor named C.J. about once a week. He'll buy your fish at double the price you get at Nook's Cranny, so save your high-value (maybe anything over 1000 bells) fish in storage until he comes. Early in the game, you'll probably need to sell all fish at Nook's Cranny to fund various expansions. Before C. J. will buy your fish, he'll send you on a mission to catch something specific, like three small fish in a row. 5) Don't Scare the Fish Sudden movements will cause fish to disappear, so don't use a tool like a net or ladder near a fish you want to catch. Running on the beach or by the river's edge, pole vaulting across a river, or jumping (which can happen accidentally on some jagged river edges) will scare fish away. When you catch one fish, other nearby fish might be scared away if they are too close, especially if they are facing the catch, so if you are on a mystery island and multiple fish are in the area, target your favorite one first. 6) Fish Bait If you make fish bait, you are guaranteed to have a fish spawn wherever you scatter it. Hold your fishing rod, scatter the fish bait in the water, and cast your rod over and over to collect fish that appear. Every time you catch something, your avatar will show it off and re-set facing you, so you may need to re-position, depending on the angle. 7) Mystery Islands and Fishing I was hoping that mystery islands would lead to completely new fish (for fishing and diving), but they don't. However, some islands are designed to have only big fish, or feature clifftops and waterfalls that spawn lots of fish, so you can still take a virtual fishing vacation and return with a few treasures. 5 Things About the Beach in Animal Crossing 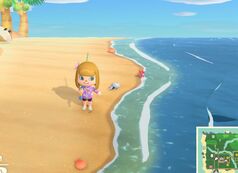 Shells are abundant in Animal Crossing Shells are abundant in Animal Crossing 1) Shells Early in the game, it's fun to run around on the beach collecting shells and listening to those virtual ocean waves. If you're up early, you can enjoy the virtual sunrise and a meditative version of the theme song in the background, too. At first, sell those shells to collect bells, but after a while, store a few to use in DIY recipes. The most valuable shells are giant clams, followed by coral. All the shell types will stack in your pocket inventory, but since there are eight different types (sand dollars, sea snails, coral, conch, giant clams, Venus combs, sand dollars, and cowries, plus manila clams and hermit crabs), it's easy to fill up inventory slots before you collect everything along your beach. Empty your pockets of everything except essentials before you make that first shell collection run so you have enough space. Bonus: You'll also get a message in a bottle with a DIY recipe that washes up on the beach. 2) Manila Clams The bubbles in the sand indicate that there is a clam you can dig up. You can sell them, but they are the key ingredient in fish bait that you can craft at your DIY bench. Fish bait will stack up in your inventory, but clams take up individual slots. 3) Sand Everywhere! When you unlock terra-forming, you can place sand in non-beach areas of your island to create things like a volleyball pit in the forest, or a home for a palm tree that would otherwise only grow on the beach. 4) Secret Beach The back of your island has a "secret" beach. Shells and fish don't spawn there, and you can use this space for fun decorations. You may also find a shady art dealer's boat docked there from time to time. 5) Star Fragments Some nights you'll see shooting stars. You can wish on a star by using the right joystick to look up, and then press "A" when you see/hear a shooting star. The wish won't work if you are holding anything or aren't looking up, and sometimes it won't work if you are next to a villager ("A" means you start talking) or a tree ("A" means you shake it) or a vine ("A" means you climb it). During an evening with shooting stars, Celeste (an astrological owl) might show up, and she will give you DIY recipes (and tell you stories) you can make with star fragments. The next day, you can find star fragments along the beach - there are several different kinds, so, like shells, they take up more than one slot in your inventory. These can be used to craft special items after you've collected different recipes from Celeste. Star fragments will re-spawn on the beach - a little bit after you've made one round and then come back, and again if you log out and play a little while later. There's not a guaranteed number, but if you have friends over to wish on your stars, you will get more star fragments the next day than if you wish by yourself.
5 Things About Diving in Animal Crossing
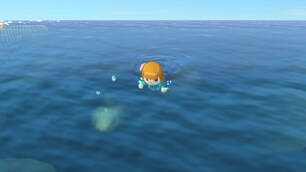
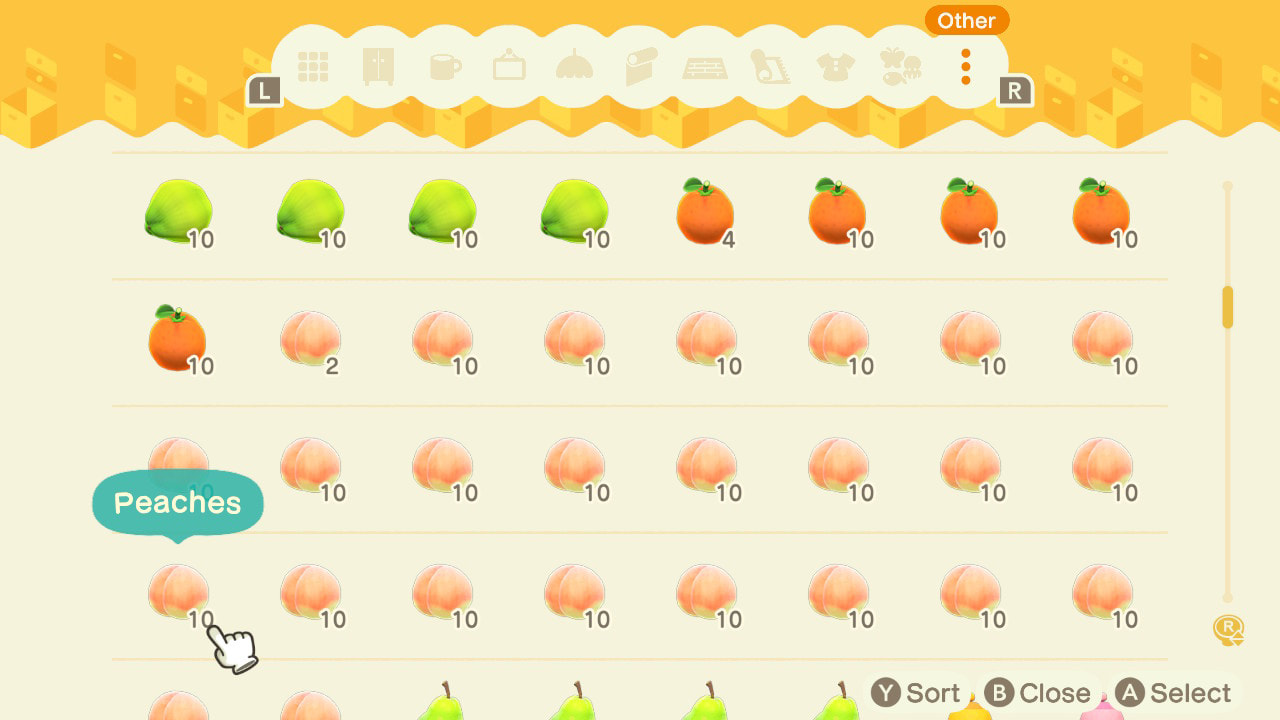
1) Show Me the Bells! Diving takes some time - maybe 10 minutes to completely fill your expanded inventory, but it's a great way to make bells, especially early in the game. The lowest value items (sea anemones, sea stars, and sea cucumbers) are all at least 500 bells, and the high value items like crabs and pearls are regularly available, and can net you over 5,000 bells each. There is no visiting character who will buy sea creatures at a higher price (like C.J. will buy fish for more than the Nook brothers), so sell them at Nook's Cranny, or keep items - especially pearls - for DIY recipes. 2) Suit Up You need to wear a SCUBA suit (you can buy this from Nook Shopping) to dive in, and you can't be holding tools when you go in to the water. (Oddly, you can check your Nook Miles phone while you're swimming, or view - but not access - your inventory). 3) How To Dive for Sea Creatures Push the left joystick in the direction you want to go, and press "A" to swim slightly faster than just drifting along. Unfortunately, there is no turbo speed option. When you see a column of bubbles, press "Y" to dive, and then press "A" until you grab the shadow and pop up with a creature. If you're under too long, you will pop up for air, and you need to press "Y" to dive again. 4) Tricky Speedsters Some of the creatures are elusive and fast, like the Venus basket, some of the crabs, and the umbrella octopus. Corner them against the nets - if you are there when they bounce off, you can grab them. I've read that if you stop pushing "A" and drift toward them and press "Y" when you are directly over them that works, too, but I've had better success with the corner method, since sometimes they dart the wrong way after I dive and are too fast to catch. 5) Pascal The first time every day that you catch a scallop, Pascal the Otter will show up and ask for it. In exchange, he will leave you with a bit of wisdom and a sea-themed DIY recipe, or sometimes an item, like a pearl, or mermaid furniture. You earn Nook Miles over time for donating scallops to Pascal. 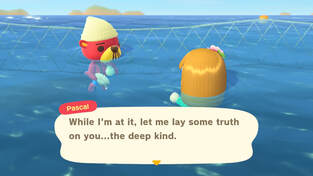 Pascal offers "deep truths" and gifts in exchange for scallops 7 Things About Trees in Animal Crossing 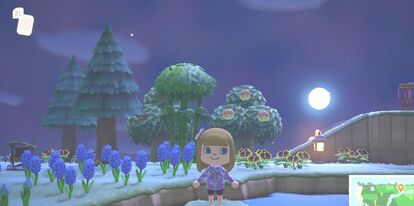 Cedar trees, a bamboo tree, and a fruit tree in Animal Crossing 1) Why Shake Trees? Trees are full of resources that you can sell or use to craft items. When you stand near a tree and shake it (press "A"), sometimes tree branches fall out. Two trees per day will give furniture when you shake them, and several others will pop out bells (money). Fruit trees will give three pieces of fruit per day (it will take three days for it to grow back again), except that coconuts give two at a time instead. Some trees will also have insects in or on them, which can be caught with nets, including five wasps per day. 2) Wasps are an Opportunity Every day, the first time you shake a tree, there is a chance that you'll get a swarm of wasps. If you get wasps and you don't have your net ready, they will sting you - you can't outrun them. I didn't really mind the swollen eye - it re-sets the next day, or you can buy medicine in Nook's Cranny to fix the swelling. The real sting is missing out on 2,500 bells per wasp. The wasp nest is also worth a few bells, or it can be used as a resource in DIY recipes. (The nests stack in your inventory; the wasps themselves don't.) Wasps do not come out of fruit trees or bamboo, but they will come out of cedar trees (pine trees), and non-fruit trees (5 per day). It can be helpful to put all your fruit trees together or find a way to mark them, because after you collect fruit, you can't tell which trees might give wasps and which ones won't until the fruit grows back. 3) Chopping Trees for Wood You can hit each tree three times without chopping it down with a flimsy axe, and get three pieces of wood, hardwood, or softwood that can be used to craft items. A regular axe will last longer, but on the third swing, the tree will be cut down, leaving a stump. If you want to maximize wood collection each day, use your net to check trees for wasps first. Then craft 4-5 flimsy axes and do another circuit around the trees to collect wood. The flimsy axes break quickly, so having them on hand makes it easier to keep going without having to run back to make a new one. Each type of wood (tree branches, hardwood, softwood, and wood) takes up one slot in your inventory - 30 pieces each. If you're not particular and don't mind missing out on a resource or two, you could just use a regular axe and only hit each tree twice each day, but if you want to get them all, you might want to move your trees to just a few areas so it's easier to remember which ones you've shaken and chopped. 4) Tree Stumps Some insects only spawn on tree stumps, so to round out the Critterpedia, it's good to have a couple of these on your island. Use any axe except the flimsy kind to swing at a tree three times to cut it down. A stump will remain, which you can remove (but not re-locate) with a shovel. Eat a piece of fruit to gain enough strength to uproot the stump, which disappears. 5) Moving Trees Just like with tree stumps, you have to eat a piece of fruit to be strong enough to dig up a tree with your shovel. The whole tree will be in your inventory, and you can re-plant it where you like, as long as it's not right next to an object like a cliff or furniture or another tree. If there are flowers or rocks in the nine-grid around your tree, you limit areas where resources like fruit, tree branches, and wood can land. You cannot place a tree in your storage, but you can sell it if you don't want to re-plant it. 6) Money Trees When you see a golden light coming from a spot in the ground once a day, dig it up with a shovel - it's a bag of money! If you plant more bells inside that glowing spot, you'll grow a money tree after several days, with three sets of bells (like fruit) that you can harvest one time. After that, the tree will give wood and tree branches, and be a place to spawn bugs, furniture or regular bells. If you plant bells in the glowing spot every time, it's a guaranteed payback, but eventually you will have too many trees if you don't cut some of them down. 7) Bamboo, Coconut, and Non-Native Fruit Trees Every island in Animal Crossing has a native fruit type: apples, cherries, oranges, peaches, or pears. When you visit mystery islands, using a Nook Miles ticket to fly, or a boat tour with Kapp'n, you can collect different types of fruit, bring it back to your island, bury it, and wait for it to grow into a tree. You can also transplant the whole tree into your inventory and back to your home island (if you eat fruit and use the shovel to do it.) The fruit can be sold or used in DIY recipes, or used for villager gifts. Bamboo is also used in DIY recipes, and you can transport whole bamboo trees or bamboo shoots back to your island, where they will grow where they're planted. Coconut trees can be transported (or grown from the fruit), but only in sand. I loved them and got a bunch, but if you have too many, they can obstruct the view for fishing or other decorations. 4 Things About Rocks in Animal Crossing
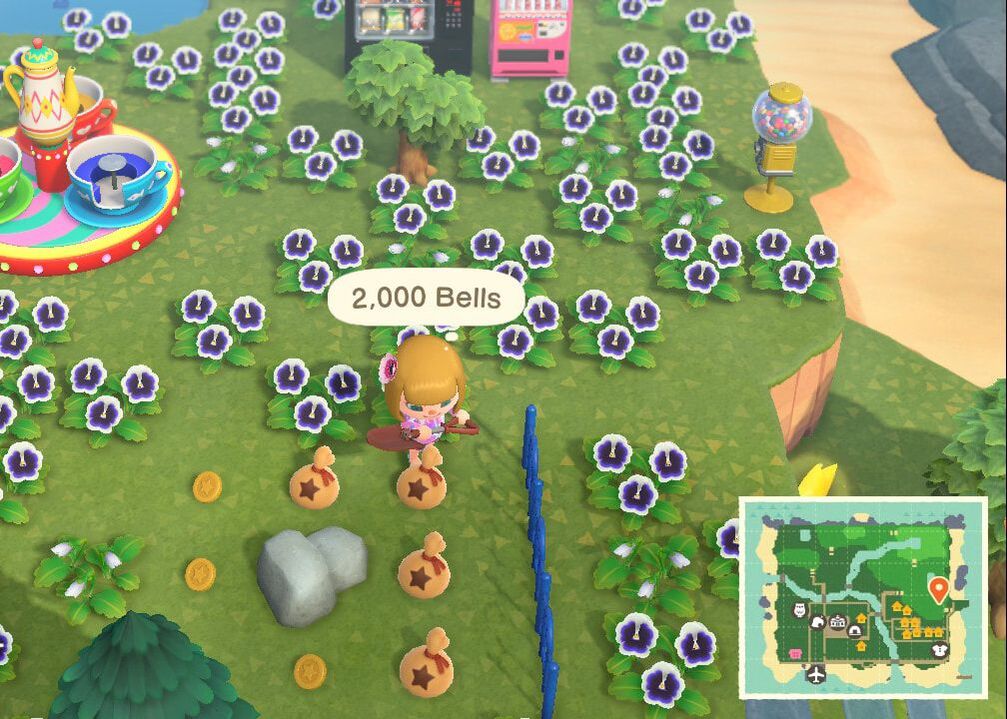
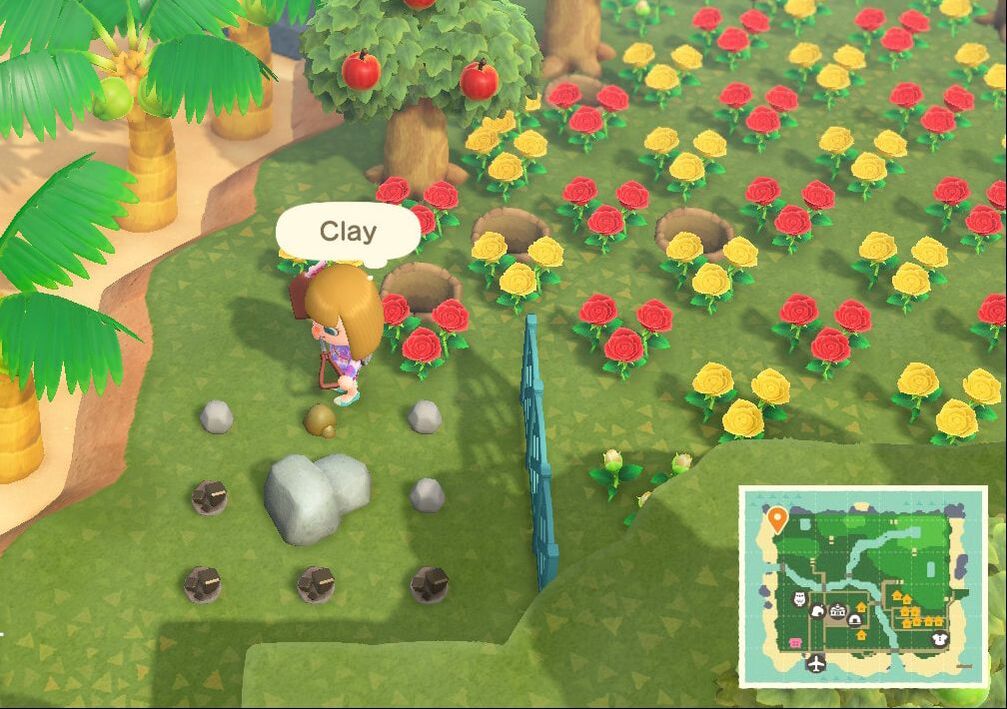
1) Why Hit Rocks? Rocks are full of resources, such as iron nuggets, clay, gold nuggets, and stone, that allow you to craft items, including tools and furniture. Every day, five rocks on your island will produce resources and one rock will produce bells. You get resources once a day if you hit a rock eight times in ten seconds with a shovel. You can get a few more rocks if you fly with Nook Miles or take a mystery island boat tour. 2) How do I Get All Eight Resources Per Rock? Picture a nine-grid with the rock in the center (see images, above) - all eight squares around it need to be clear of objects to get all eight resources from the rock. Your character will also eventually back up away from the rock as you hit it, unless you block yourself in. You can dig three holes on one side (behind one row of the nine grid), and you'll have to re-dig them every day. You can also place sections of fencing behind your resource area so you won't have to dig the holes every time. Note, though - you can't place fences on a mystery island, so you'll have to use the shovel trick. Tip: Don't collect the extra piece of stone next to the rock until right before you hit that rock each day, as a reminder about which rocks you've already hit or not. 3) Moving Rocks The rocks will stay in the same place every day, unless you eat fruit and then hit the rock with a shovel or an axe to break it. Then it will spawn in a different spot the next day. 4) Under the Rock Sometimes hitting a rock will spawn an insect, but you need to keep striking with your shovel to get resources before 10 seconds are up. Get your eight hits in, then switch from your shovel to your net as fast as possible to catch the creature, then go back and collect the nuggets or clay or stone. Like hermit crabs on the beach, these insects will wander away fairly quickly and disappear if you don't net them fast. You can sometimes get an insect from a rock that's already been hit for resources. 7 Things About Flowers in Animal Crossing
1) Why Grow Flowers? They don't actually sell for very much in Nook's Cranny, so they're not a good focus for bells. They are used in a few DIY recipes, and they can add to your island evaluation rating, and they encourage certain insects to appear. Plus, they look nice! 2) Blue Roses Blue roses are the most sought-after flower in the game, and they cannot be bought from Leif or Nook's Cranny or collected from mystery islands - they must be bred. 3) Types of Flowers Roses, tulips, hyacinths, lilies, pansies, windflowers, cosmos, and mums can be bought at Nook's Cranny or from Leif or collected from mystery islands in red, white, or yellow colors only (windflowers are red, white, and orange instead). Any other color must be bred. Lilies of the Valley appear on upper levels when you have earned a 5-star island rating. 4) Breeding Flowers If you want to focus on this, get a guide for your target flower species, and plan to set aside a fair amount of island space for each area. Generally, you want to space existing plants in checkerboard pattern, leaving space for new flowers to grow in between. The most likely thing is that an existing flower will clone itself, but if you surround a spot with two of one color and two of another, there's a chance of getting a new color, especially if you water the flowers (or it rains) every day. Luck increases if a real-world friend who also plays ACNH visits your island and waters the flowers you're trying to breed. Generally, white + white = blue, red + white = pink, and red + yellow = orange, but that's not true for every species. Some species take many stages and colors before a desired color is possible. You cannot breed different flower species with each other to grow anything new. Breeding flowers is also tricky because some stages require a "special red," which has been bred from two other special colors, but the special red will be indistinguishable visually from regular reds that are sold from seeds in Nook's Cranny. So you need land space to generate required colors in each stage, and then to move some of them some place else so you won't mix them up - and monitor them so that no unintended flowers invade that special area where you're trying to get a certain color. It takes time and patience, and a little luck. 5) Unique Features Some insects will only spawn on certain colors of flowers, so having a variety is helpful if you want to catch everything for the Critterpedia and museum. Some flowers only grow at higher elevations, but they can be transplanted. The lily-of-the-valley only grows on an island after it has reached a five-star rating, and golden roses can only be bred with a a golden watering can (which requires a five-star island rating to craft). 6) Flower Placement You can plant flowers right up against trees, but falling items from trees or mystery balloons have to land on blank spaces. If a tree's nine-grid is surrounded by flowers, items (bells, furniture, hives, branches, wood) can't fall out of it and land nearby. You can use this to target where those items fall to make collection easier. Take care collecting other items near your valuable flowers, since it's easy to accidentally pluck them if you press "y" and intended to grab something else. The flowers will grow back if you pick them, but it can delay flower breeding. Also, if you run through your flowers - pressing "b" while directing the stick - it can shred the petals. Again, they'll grow back. 7) Watering Flowers Every day that you water a flower, you have an increased chance of it breeding to make a new color. If it rains or snows, that's the same as having the flowers watered. Sometimes, villagers will water flowers, too. Flimsy watering cans wear out faster and have a different watering pattern than regular watering cans. A sparkle on a flower's petals shows it's been recently watered. 15 Things About Villagers in Animal Crossing
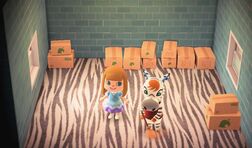
1) Number of Villagers You can only have a total of 10 villagers living on your island at a time, plus an occasional campsite visitor. Each villager has a specific look, personality type, catchphrase, and design aesthetic. For example, Octavian the octopus moves in with all outer-spaced themed furniture and dark walls and flooring. If you give a villager a lot of clothes and furniture, they will start using those things more and lose their distinctive styles. The exception is wall-mounted furniture, which villagers don't display. 2) Reactions and Personality Types Reactions are another thing you can collect in ACNH, and you can collect them from villagers with different personality types. For example, the jock, peppy, lazy, snobby, and sisterly types of villagers each teach you different types of emotions to show with your avatar, including distress, or frustration, or joy. There are dozens of reactions to learn, but you can really only use 8 at a time, so they're less of a collection goal for me early in the game. Villagers will approach you to teach you reactions. 3) Villager Photos One collection goal in ACNH is villager photos, which can be obtained as gifts after reaching a high level of friendship with in-game neighbors. When they are displayed in your island home, it improves the Happy Home Academy rating significantly. 4) High Friendship Levels with Villagers Every interaction is an opportunity to raise your level of friendship. At first, you have the opportunity to say hello, and maybe play a game or do a favor. After a couple of days, you'll have the option to give a gift, and for every gift you give a villager, you'll get something in return (get ready to accumulate a lot of relay tank tops). Over time, villagers will invite you to their homes, or ask to be invited to yours. They'll also start to have a special nickname or catchphrase with you, and then offer to trade, sell, or buy things from your pockets. This is a stage when you may receive a photo from a villager. 5) Tips for Getting Villager Photos Be sure to say hello and give a gift every day to each neighbor, and say yes to their requests as often as possible. If you give wall-mounted presents (things you can craft), villagers don't display them in their homes, which keeps their distinctive decor in place. You can also give fruit, but you get more points for furniture. A friend discovered that giving fossils (assessed fossils that Blathers already has) is a great way to get photos quickly; you don't even have to wrap them, and villagers don't display them. 6) When You Can't Give a Gift to Villagers The menu option to give a gift will not appear if you've only met recently - keep talking and in a few days, you'll see it. You also cannot give a gift if the villager is sitting or fishing, or if they've invited themselves to your house (or theirs). You won't see the option to give a gift if you have already given a gift to that villager that day, either. 7) Mailing Gifts to Villagers You can attach a gift to a resident by sending it with a postcard. Go to the airport and stop at the filing cabinet to the right of the flight counter to open the postcard menu. It will cost a few bells to send each postcard - attach the gift using the bottom right tab to open your inventory. You can mail gifts in addition to the daily gifts you hand-deliver to villagers. 8) Wrapping Gifts Nook's Cranny sells wrapping paper, and when it's in your pockets, click on the gift wrap, and then you can select the items available to wrap. After you wrap a gift, it isn't labeled, so if you give different gifts to different neighbors, you have to remember where each gift is in your inventory. Also, if you select a fruit or giant clam or things that stack, it will wrap all the items in that stack, not just one of them. 9) Lowering Friendship Levels If you ignore villagers, or push into them a lot, or talk to them more than eight times a day, or swat them with your net or other tools, this can lower your friendship with them. Also, don't forget to show up at their birthday parties with a wrapped gift, and don't give them gifts like weeds or junk from fishing. 10) Favors, Visits, and Time As always, choose what works best for you in the game. If you're on a fishing expedition, you may not want to play cards with a sheep in your living room. However, if obtaining villager photos is a primary goal for you, you'll want to say yes as often as possible to these requests. Villagers may ask you to: -Deliver an item to another neighbor (do this the same day, and go back to the original requester to tell them you completed the mission afterward for increased friendship points) -Catch a specific fish or bug -Bring them medicine -Come over, or go to your house Once in their house, you can leave quickly if you like - especially after you've played a game with them. When they are in your house, sometimes they will give you a photo if your friendship level is high and you keep talking. If your friendship level is medium and you want them to leave, you can just stop talking and they should take off after a few minutes. Or you can just leave and they will take the hint and go, too. 11) Light Bulbs Over Heads If you see a villager walking around with a light bulb, it's an invitation to engage that neighbor. They may tell you they need a favor, or they may want to give you an item from pockets, or buy something from you. They may also be thinking about moving away from the island. 12) To Move, or Not to Move? You may want to wait until you've collected a villager's photo before you encourage them to move on, or you might be attached to some villagers and want them to stay on your island forever. When you are ready for one to go, you can ignore that villager - no gifts or chats - and eventually, you should see that villager call out to you about moving (or walking around with a light bulb, and contemplating moving). You can tell them no, you want them to stay, or you can say yes, it's time. The villager will always do what you ask. As soon as you tell that villager to go, they'll start packing their things, a state known as "in boxes." This will leave an empty spot for a new villager to move in. The day after you ask them to move, they'll be in boxes, and the next day, they'll move out and leave an empty lot where the house once stood. Note: there is no goodbye ceremony or last visit with the villager, so if you like, take a selfie or a group exercise photo that includes that villager before you tell them to go. 13) Seeking New Neighbors You'll meet new potential villagers on mystery islands (and on islands of real-life players), and you can talk to these villagers a few times - not just once per encounter! - and encourage them to move to your island if you like. You will also get random visitors to your campsite from time to time, even if your ten villager slots are full. If you see a new villager you like, talk to them several times until you have the option to invite them to move in. They might say they've talked to resident services and they don't have room, but then ask if you've heard of anyone who might like to move away. At that point, they might name a resident to kick out of the island to make space for the new camper. Since there are hundreds of different villagers, collecting all of the photos is a huge task. Many people online seek specific villagers, and you can buy amiibo cards (like trading cards; each featuring a different character) with real money to invite the villagers featured on those cards to move in. However, it's fun to see who shows up randomly, so you could just leave your new neighbor to chance. Some players prefer to stick with their original cast instead of swapping neighbors often, while others try to have islands with all peppy personalities, or all cats, or even their "dreamies" - the ACNH word for a player's most-desired villagers. 14) In Boxes If you have real-life friends who might like your villager to move to their islands, you can make an arrangement. Someone has to have the target villager in boxes at the same time the other person has an island vacancy. You can make the introduction with a visit via Dodo Airlines, and the person with the vacancy can chat with the target villager multiple times to encourage that villager to move to their island. After villagers move, they may sometimes mention the real-life island representatives they met earlier on. 15) Animal Villager Types Alligators, Anteaters, Bears, Birds - Chickens, Ducks, Eagles, Ostriches, Penguins - Bulls, Cats, Cows, Deer, Dogs, Elephants, Frogs, Goats, Gorillas, Hamsters, Hippos, Horses, Kangaroos, Koalas, Lions, Mice, Monkeys, Octopuses, Pigs, Rabbits, Rhinos, Sheep, Squirrels, Tigers, Wolves 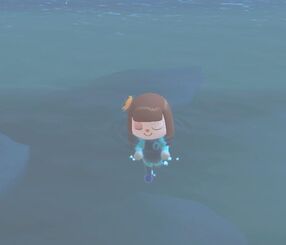 Fashionable early game days: swollen eye, computer-generated nose, and SCUBA suit
When I started my island, I appreciated comprehensive guides and tips, so I wanted to record ideas that would have helped me. There are many more details to this game to explore and discover, but I'm hopeful I helped a few beginners!
Read more about Animal Crossing's educational benefits for students (but feel free to enjoy the game yourself, too!)
0 Comments
Your comment will be posted after it is approved.
Leave a Reply. |
Jamie Wright
I've had the privilege of working with hundreds of students and families in IA, CT, NC, MO, TX, and Canada. I love being a teacher-librarian! Categories
All
Archives
May 2024
|
- Home
-
Book Recommendations
-
Alphabetical List of Book Recommendations
>
- Abby Spencer Goes to Bollywood
- Absolutely Almost
- The Absolutely True Diary of a Part-Time Indian
- After Ever After
- After Iris
- Airborn >
- Alex Rider - series
- All Fall Down
- All the Answers
- All the Broken Pieces
- All You Knead is Love
- Allegedly
- All's Faire in Middle School
- Amal Unbound
- Amazing Grace
- American Born Chinese
- Amina's Voice
- Among the Hidden - series
- Anger is a Gift
- Anne of Green Gables - series >
- Artemis Fowl - series
- Athlete vs. Mathlete
- Awkward
- The Bad Apple - Merits of Mischief
- Bad Princess: True Tales from Behind the Tiara
- Bamboo People
- Ban This Book
- Because of Mr. Terupt
- Bernice Buttman, Model Citizen
- Bionic
- The Black Pearl
- Blended
- Blue Jasmine
- Bomb: The Race to Make - and Steal - the World's Most Dangerous Weapon
- The Book of a Thousand Days
- Booked
- A Boy Called Bat
- Boys Without Names
- The Breadwinner Trilogy
- Breaking Stalin's Nose
- Bright
- Brown Girl Dreaming
- Bud, Not Buddy
- Bump
- The Cardturner
- Carry On
- Caterpillar Summer
- Catherine, Called Birdy >
- Charlie and the Chocolate Factory
- Chasing Secrets
- Chasing Vermeer
- Checked
- Chronicles of Prydain
- Chu Ju's House
- Circa Now
- Click
- Climbing the Stairs
- Code Name Verity - Series
- Code Talker
- Colin Fischer
- Come November
- Confetti Girl
- Count Me In
- Counting By 7s
- Courage for Beginners
- The Courage Test
- Crenshaw
- Criss Cross
- A Crooked Kind of Perfect
- Curveball: The Year I Lost My Grip
- Dangerous
- Dead End in Norvelt
- Dealing with Dragons
- Dear Mr. Henshaw
- A Diamond in the Desert
- The Dirt Diary - Series
- Divergent - Series
- Does My Head Look Big in This?
- Dog Man
- Dog Whisperer - Series
- Drive Me Crazy
- A Drop of Hope
- Drums, Girls, and Dangerous Pie
- Echo
- El Deafo
- Eleanor & Park
- Elephant Secret
- Eleven Birthdays
- Elijah of Buxton
- Ella Enchanted
- Ellen Outside the Lines
- Emma-Jean Lazarus Fell Out of a Tree
- Ender's Game
- Enna Burning
- Enola Holmes
- Eragon
- Escape from Mr. Lemoncello's Library
- Escape Under the Forever Sky
- Esperanza Rising >
- Eventown
- Ever
- Ever After High
- Every Shiny Thing
- Everything on a Waffle
- Fairest
- Falling Over Sideways
- The False Prince Series
- Fake Mustache
- Family Game Night and Other Catastrophes
- Famous Phonies
- Feathers
- Fever, 1793
- The Fifth Wave
- Fifty-Four Things Wrong with Gwendolyn Rogers
- The 57 Bus
- Finding Perfect
- The Fingertips of Duncan Dorfman
- The Fire, The Water, and Maudie McGinn
- The First Rule of Punk
- Fish in a Tree
- Flora and Ulysses
- Flygirl by Sherri Smith
- Focused
- Forget Me Not
- The Fourteenth Goldfish
- Framed!
- Frankie Sparks - Series
- Free Thaddeus!
- From the Mixed-up Files of Mrs. Basil E. Frankweiler >
- Front Desk
- Full Cicada Moon
- The Garden of My Imaan
- Garvey's Choice
- Geek Girl - Series
- The Genius Files >
- Ghost
- A Gift of Magic
- The Girl in the Well is Me
- Girl, Stolen
- The Girl Who Could Fly
- The Girl Who Drank the Moon
- The Girl Who Threw Butterflies
- The Giver
- Go Big or Go Home
- Gold Medal Summer
- Golden Girl
- The Goldfish Boy
- Good Dog
- A Good Kind of Trouble
- The Goose Girl
- Gracefully Grayson
- Grandmaster
- The Graveyard Book
- Greetings from Witness Protection
- Hachiko Waits
- The Handbook for Dragon Slayers
- A Handful of Stars
- Half a World Away
- Hamster Princess - Series
- Harry Potter - Series
- Hatchet
- Her Own Two Feet
- Hero
- The Heroes of Olympus Series
- Hey, Kiddo
- The Higher Power of Lucky
- Holes >
- Home of the Brave
- The Homework Machine
- The Homework Strike
- The Honest Truth
- Hope Was Here
- The House That Lou Built
- How to Ditch Your Fairy
- How to Steal a Dog
- How to Train Your Dragon Series
- The Hundred Dresses
- The Hunger Games Series
- I Am a Genius of Unspeakable Evil and I Want to Be Your Class President
- I Am Not Your Perfect Mexican Daughter
- I Have a Bad Feeling About This
- I Am Number Four
- I Heart Band
- I Kill the Mockingbird
- I Survived . . . Series
- I Will Always Write Back
- Ida B
- If I Were You
- If a Tree Falls at Lunch Period
- In the Shadow of the Sun
- Incommunicado
- Inside Out and Back Again
- Insignificant Events in the Life of a Cactus
- The Invention of Hugo Cabret
- Invisible World
- It's Raining Cupcakes
- James and the Giant Peach
- Jefferson's Sons
- Karma Khullar's Mustache
- Keeping Corner
- The Kidney Hypothetical
- The Kite Fighters >
- Knock Out
- Lasagna Means I Love You
- The Last Book in the Universe
- The Last Shot: Mystery at the Final Four
- Left Out
- Legend
- The Lemonade War
- Liberty Porter, First Daughter
- Lies We Tell Ourselves
- Lights, Camera, Disaster
- Lily and Dunkin
- The Limit
- The Lions of Little Rock
- Listen, Slowly
- Listening for Lions
- Little House - Series
- Little Miss Evil
- A Little Princess
- Locomotion >
- The Long Ride
- A Long Walk to Water
- Long Way Down
- Losers Take All
- The Lost Girl
- Lost in the Sun
- Love That Dog
- Lunch Money
- The Magician's Elephant
- Maniac Magee
- Mascot
- Masterpiece >
- A Match Made in Mehendi
- Matched Trilogy
- Maus
- Maybe a Fox
- Maybe He Just Likes You
- The Maze Runner
- Me and Marvin Gardens
- Medusa Jones
- A Million Shades of Gray
- Minnie McClary Speaks Her Mind
- The Miraculous Journey of Edward Tulane
- The Miscalculations of Lightning Girl
- Mockingbird
- Morning Girl
- Morning Star
- Mrs. Frisby and the Rats of NIMH >
- My Basmati Bat Mitzvah
- My Life in Pink and Green
- My Life with the Liars
- The Mysterious Benedict Society
- Nathan Hale's Hazardous Tales
- Neil Flambe
- The Neptune Project
- Nerd Camp
- NERDS
- New Kid
- The Next Great Paulie Fink
- The Night Diary
- A Night Divided
- Ninth Ward
- No Summit Out of Sight
- No Talking
- Not If I Can Help It
- Notes from an Accidental Band Geek
- Nothing But the Truth
- Number the Stars >
- OCDaniel
- Olive's Ocean
- On My Honor >
- On the Wings of Heroes
- The One and Only Ivan
- One Came Home
- One Crazy Summer
- One Half from the East
- One Jar of Magic
- One of the Survivors
- One of Us is Lying
- One Small Step
- One True Way
- Orbiting Jupiter
- The Other Half of My Heart
- The Other Side of Truth
- Out of My Mind
- Out of the Dust
- Outrun the Moon
- Paint the Wind >
- The Paper Cowboy
- Paperboy
- Peak
- Percy Jackson and the Olympians
- The Phantom Tollbooth
- Piecing Me Together
- Pippi Longstocking
- Planet Earth is Blue
- The Player King
- The Porcupine of Truth
- Posted
- The President's Daughter (series)
- Princess Academy
- The Princess in Black
- The Pros of Cons
- The Puttermans Are in the House
- The Puzzling World of Winston Breen
- Rachel Spinelli Punched Me in the Face
- Rancho Rosetta Series
- Real Friends
- Rebel McKenzie
- The Red Pencil
- Red Thread Sisters
- Red, White, and Whole
- Reluctant Journal of Henry K. Larsen
- The Report Card
- Rescued
- Restart
- Revolution is Not a Dinner Party
- River Secrets
- Roll With It
- Roller Girl
- Romeo Blue
- Roses and Radicals
- Ruby on the Outside
- Rules
- Rules for Stealing Stars
- The Running Dream
- Sadako and the Thousand Paper Cranes
- Sahara Special
- Salt and Sugar
- Salt to the Sea
- Same Sun Here
- Samurai Rising
- Sarah, Plain and Tall
- Sarai and The Meaning of Awesome
- Saraswati's Way
- Sassy - series
- Save Me a Seat
- School of Fear
- The School for Good and Evil
- Schooled
- The Schwa Was Here
- A Season of Daring Greatly
- The Secret Diary of Lydia Bennet
- Secret Keeper
- The Secret School
- The Seventh Wish
- Shakespeare's Secret
- Shooting Kabul
- Sideways Stories from Wayside School
- The Sign of the Beaver
- Simon Sort of Says
- Sing Down the Moon
- A Single Shard >
- The Sisters Grimm
- Six Impossible Things
- Slider
- Sliding Into Home
- Smile
- The Smile
- A Snicker of Magic
- Soar
- Some Places More Than Others
- Something Rotten: A Fresh Look at Roadkill
- Song for a Whale
- Space Case
- Sparrow
- Speak
- Speechless
- Spin the Golden Light Bulb
- Stargazing
- Stargirl >
- Star Wars: Jedi Academy
- Stef Soto, Taco Queen
- Stink and the Incredible, Super Galactic Jawbreaker
- Stone Fox
- Story Thieves
- The Strange Case of Origami Yoda
- Stuck on Earth
- The Summer I Saved the World in 65 Days
- Surviving the Applewhites
- Survival Strategies of the Almost Brave
- The Swap
- The Sweetest Sound
- The Tail of Emily Windsnap >
- Take Me to the River
- The Tale of Despereaux
- A Tangle of Knots
- The Tapper Twins - series
- Tasting the Sky
- That Thing About Bollywood
- TBH This is So Awkward
- The Thief
- The Thing About Jellyfish
- Things Not Seen
- 33 Minutes
- Thirst
- This Journal Belongs to Ratchet
- This Side of Home
- Threads
- The Tiger Rising >
- A Time to Dance
- The Total Tragedy of a Girl Named Hamlet
- The Trials of Apollo (series)
- The True Meaning of Smekday
- Tumbling
- Turning 15 on the Road to Freedom
- The Two Princesses of Bamarre
- Uglies
- Ultra
- Unbound
- Under a Painted Sky
- The Underneath
- Under the Egg
- Ungifted
- Unidentified Suburban Object
- The Unlikely Hero of Room 13B
- The Unwanteds
- Uprising
- Upside Down Magic
- The View from Saturday
- The Vigilante Poets of Selwyn Academy
- Vincent Shadow, Toy Inventor
- Waiting for Normal
- Wake Up Missing
- The War That Saved My Life
- We Are All Made of Molecules
- We Are Okay
- We Are Party People
- Wedgie & Gizmo
- The Wednesday Wars
- The Westing Game
- When You Trap a Tiger
- Where the Mountain Meets the Moon
- Where the Red Fern Grows
- A Whole Nother Story
- Wishtree
- The Witch of Blackbird Pond >
- Woods Runner
- Woof
- Wonder
- Words on Fire
- The World Ends in April
- A Wrinkle in Time
- A Year in the Life of a Total and Complete Genius
- You Bring the Distant Near
- Young Fu of the Upper Yangtze
- Zebra Forest
- Zen and the Art of Faking It
- Zoey and Sassafras
-
Book Topics - Categories
>
- Book Topics - Animals
- Book Topics - The Arts
- Book Topics - Careers
- Book Topics - Competitions
- Book Topics - Families
- Book Topics - Health
- Book Topics - Historical Events
- Book Topics - Journeys
- Book Topics - Legends, Myths, and Fairy Tales
- Book Topics - The Outdoors
- Book Topics - School
- Book Topics - Society, Community
- Book Topics - Sports
- Book Topics - Unexplained Phenomena
-
Book List by Theme
>
- Book Themes - Self
- Book Themes - Families
- Book Themes - Education
- Book Themes - Nature and the Environment
- Book Themes - Social Interactions
- Book Themes - Society
- Book Themes - Prejudice
- Book Themes - Overcoming Obstacles
- Book Themes - Integrity
- Book Themes - Miscellaneous
- Book Themes - Values and Conflicts
- Book List by Format
- Book List by Author
- Book List by Setting
- Book List by Genre >
- Book List by Grade Level >
- Middle School Book Talk Videos
- Book Series Lists >
- Award - Winning Books >
- Book Quizzes
- Book Buying Guide Lists
- Eight Great Books Lists >
- IB-PYP Book Lists
- Picture Books for Lessons >
-
Alphabetical List of Book Recommendations
>
-
Enrichment
- Enrichment Ideas
-
Chez Moi Math Problem Solving
>
- Week 1 Chez Moi Math Problem Solving
- Week 2 Chez Moi Math Problem Solving
- Week 3 Chez Moi Math Problem Solving
- Week 4 Chez Moi Math Problem Solving
- Week 5 Chez Moi Math Problem Solving
- Week 6 Chez Moi Math Problem Solving
- Week 7 Chez Moi Math Problem Solving
- Week 8 Chez Moi Math Problem Solving
- Week 9 Chez Moi Math Problem Solving
- About
- Blog

 RSS Feed
© 2017 - 2024 - Ideas for Learners by Jamie Wright
|
|
- Home
-
Book Recommendations
-
Alphabetical List of Book Recommendations
>
- Abby Spencer Goes to Bollywood
- Absolutely Almost
- The Absolutely True Diary of a Part-Time Indian
- After Ever After
- After Iris
- Airborn >
- Alex Rider - series
- All Fall Down
- All the Answers
- All the Broken Pieces
- All You Knead is Love
- Allegedly
- All's Faire in Middle School
- Amal Unbound
- Amazing Grace
- American Born Chinese
- Amina's Voice
- Among the Hidden - series
- Anger is a Gift
- Anne of Green Gables - series >
- Artemis Fowl - series
- Athlete vs. Mathlete
- Awkward
- The Bad Apple - Merits of Mischief
- Bad Princess: True Tales from Behind the Tiara
- Bamboo People
- Ban This Book
- Because of Mr. Terupt
- Bernice Buttman, Model Citizen
- Bionic
- The Black Pearl
- Blended
- Blue Jasmine
- Bomb: The Race to Make - and Steal - the World's Most Dangerous Weapon
- The Book of a Thousand Days
- Booked
- A Boy Called Bat
- Boys Without Names
- The Breadwinner Trilogy
- Breaking Stalin's Nose
- Bright
- Brown Girl Dreaming
- Bud, Not Buddy
- Bump
- The Cardturner
- Carry On
- Caterpillar Summer
- Catherine, Called Birdy >
- Charlie and the Chocolate Factory
- Chasing Secrets
- Chasing Vermeer
- Checked
- Chronicles of Prydain
- Chu Ju's House
- Circa Now
- Click
- Climbing the Stairs
- Code Name Verity - Series
- Code Talker
- Colin Fischer
- Come November
- Confetti Girl
- Count Me In
- Counting By 7s
- Courage for Beginners
- The Courage Test
- Crenshaw
- Criss Cross
- A Crooked Kind of Perfect
- Curveball: The Year I Lost My Grip
- Dangerous
- Dead End in Norvelt
- Dealing with Dragons
- Dear Mr. Henshaw
- A Diamond in the Desert
- The Dirt Diary - Series
- Divergent - Series
- Does My Head Look Big in This?
- Dog Man
- Dog Whisperer - Series
- Drive Me Crazy
- A Drop of Hope
- Drums, Girls, and Dangerous Pie
- Echo
- El Deafo
- Eleanor & Park
- Elephant Secret
- Eleven Birthdays
- Elijah of Buxton
- Ella Enchanted
- Ellen Outside the Lines
- Emma-Jean Lazarus Fell Out of a Tree
- Ender's Game
- Enna Burning
- Enola Holmes
- Eragon
- Escape from Mr. Lemoncello's Library
- Escape Under the Forever Sky
- Esperanza Rising >
- Eventown
- Ever
- Ever After High
- Every Shiny Thing
- Everything on a Waffle
- Fairest
- Falling Over Sideways
- The False Prince Series
- Fake Mustache
- Family Game Night and Other Catastrophes
- Famous Phonies
- Feathers
- Fever, 1793
- The Fifth Wave
- Fifty-Four Things Wrong with Gwendolyn Rogers
- The 57 Bus
- Finding Perfect
- The Fingertips of Duncan Dorfman
- The Fire, The Water, and Maudie McGinn
- The First Rule of Punk
- Fish in a Tree
- Flora and Ulysses
- Flygirl by Sherri Smith
- Focused
- Forget Me Not
- The Fourteenth Goldfish
- Framed!
- Frankie Sparks - Series
- Free Thaddeus!
- From the Mixed-up Files of Mrs. Basil E. Frankweiler >
- Front Desk
- Full Cicada Moon
- The Garden of My Imaan
- Garvey's Choice
- Geek Girl - Series
- The Genius Files >
- Ghost
- A Gift of Magic
- The Girl in the Well is Me
- Girl, Stolen
- The Girl Who Could Fly
- The Girl Who Drank the Moon
- The Girl Who Threw Butterflies
- The Giver
- Go Big or Go Home
- Gold Medal Summer
- Golden Girl
- The Goldfish Boy
- Good Dog
- A Good Kind of Trouble
- The Goose Girl
- Gracefully Grayson
- Grandmaster
- The Graveyard Book
- Greetings from Witness Protection
- Hachiko Waits
- The Handbook for Dragon Slayers
- A Handful of Stars
- Half a World Away
- Hamster Princess - Series
- Harry Potter - Series
- Hatchet
- Her Own Two Feet
- Hero
- The Heroes of Olympus Series
- Hey, Kiddo
- The Higher Power of Lucky
- Holes >
- Home of the Brave
- The Homework Machine
- The Homework Strike
- The Honest Truth
- Hope Was Here
- The House That Lou Built
- How to Ditch Your Fairy
- How to Steal a Dog
- How to Train Your Dragon Series
- The Hundred Dresses
- The Hunger Games Series
- I Am a Genius of Unspeakable Evil and I Want to Be Your Class President
- I Am Not Your Perfect Mexican Daughter
- I Have a Bad Feeling About This
- I Am Number Four
- I Heart Band
- I Kill the Mockingbird
- I Survived . . . Series
- I Will Always Write Back
- Ida B
- If I Were You
- If a Tree Falls at Lunch Period
- In the Shadow of the Sun
- Incommunicado
- Inside Out and Back Again
- Insignificant Events in the Life of a Cactus
- The Invention of Hugo Cabret
- Invisible World
- It's Raining Cupcakes
- James and the Giant Peach
- Jefferson's Sons
- Karma Khullar's Mustache
- Keeping Corner
- The Kidney Hypothetical
- The Kite Fighters >
- Knock Out
- Lasagna Means I Love You
- The Last Book in the Universe
- The Last Shot: Mystery at the Final Four
- Left Out
- Legend
- The Lemonade War
- Liberty Porter, First Daughter
- Lies We Tell Ourselves
- Lights, Camera, Disaster
- Lily and Dunkin
- The Limit
- The Lions of Little Rock
- Listen, Slowly
- Listening for Lions
- Little House - Series
- Little Miss Evil
- A Little Princess
- Locomotion >
- The Long Ride
- A Long Walk to Water
- Long Way Down
- Losers Take All
- The Lost Girl
- Lost in the Sun
- Love That Dog
- Lunch Money
- The Magician's Elephant
- Maniac Magee
- Mascot
- Masterpiece >
- A Match Made in Mehendi
- Matched Trilogy
- Maus
- Maybe a Fox
- Maybe He Just Likes You
- The Maze Runner
- Me and Marvin Gardens
- Medusa Jones
- A Million Shades of Gray
- Minnie McClary Speaks Her Mind
- The Miraculous Journey of Edward Tulane
- The Miscalculations of Lightning Girl
- Mockingbird
- Morning Girl
- Morning Star
- Mrs. Frisby and the Rats of NIMH >
- My Basmati Bat Mitzvah
- My Life in Pink and Green
- My Life with the Liars
- The Mysterious Benedict Society
- Nathan Hale's Hazardous Tales
- Neil Flambe
- The Neptune Project
- Nerd Camp
- NERDS
- New Kid
- The Next Great Paulie Fink
- The Night Diary
- A Night Divided
- Ninth Ward
- No Summit Out of Sight
- No Talking
- Not If I Can Help It
- Notes from an Accidental Band Geek
- Nothing But the Truth
- Number the Stars >
- OCDaniel
- Olive's Ocean
- On My Honor >
- On the Wings of Heroes
- The One and Only Ivan
- One Came Home
- One Crazy Summer
- One Half from the East
- One Jar of Magic
- One of the Survivors
- One of Us is Lying
- One Small Step
- One True Way
- Orbiting Jupiter
- The Other Half of My Heart
- The Other Side of Truth
- Out of My Mind
- Out of the Dust
- Outrun the Moon
- Paint the Wind >
- The Paper Cowboy
- Paperboy
- Peak
- Percy Jackson and the Olympians
- The Phantom Tollbooth
- Piecing Me Together
- Pippi Longstocking
- Planet Earth is Blue
- The Player King
- The Porcupine of Truth
- Posted
- The President's Daughter (series)
- Princess Academy
- The Princess in Black
- The Pros of Cons
- The Puttermans Are in the House
- The Puzzling World of Winston Breen
- Rachel Spinelli Punched Me in the Face
- Rancho Rosetta Series
- Real Friends
- Rebel McKenzie
- The Red Pencil
- Red Thread Sisters
- Red, White, and Whole
- Reluctant Journal of Henry K. Larsen
- The Report Card
- Rescued
- Restart
- Revolution is Not a Dinner Party
- River Secrets
- Roll With It
- Roller Girl
- Romeo Blue
- Roses and Radicals
- Ruby on the Outside
- Rules
- Rules for Stealing Stars
- The Running Dream
- Sadako and the Thousand Paper Cranes
- Sahara Special
- Salt and Sugar
- Salt to the Sea
- Same Sun Here
- Samurai Rising
- Sarah, Plain and Tall
- Sarai and The Meaning of Awesome
- Saraswati's Way
- Sassy - series
- Save Me a Seat
- School of Fear
- The School for Good and Evil
- Schooled
- The Schwa Was Here
- A Season of Daring Greatly
- The Secret Diary of Lydia Bennet
- Secret Keeper
- The Secret School
- The Seventh Wish
- Shakespeare's Secret
- Shooting Kabul
- Sideways Stories from Wayside School
- The Sign of the Beaver
- Simon Sort of Says
- Sing Down the Moon
- A Single Shard >
- The Sisters Grimm
- Six Impossible Things
- Slider
- Sliding Into Home
- Smile
- The Smile
- A Snicker of Magic
- Soar
- Some Places More Than Others
- Something Rotten: A Fresh Look at Roadkill
- Song for a Whale
- Space Case
- Sparrow
- Speak
- Speechless
- Spin the Golden Light Bulb
- Stargazing
- Stargirl >
- Star Wars: Jedi Academy
- Stef Soto, Taco Queen
- Stink and the Incredible, Super Galactic Jawbreaker
- Stone Fox
- Story Thieves
- The Strange Case of Origami Yoda
- Stuck on Earth
- The Summer I Saved the World in 65 Days
- Surviving the Applewhites
- Survival Strategies of the Almost Brave
- The Swap
- The Sweetest Sound
- The Tail of Emily Windsnap >
- Take Me to the River
- The Tale of Despereaux
- A Tangle of Knots
- The Tapper Twins - series
- Tasting the Sky
- That Thing About Bollywood
- TBH This is So Awkward
- The Thief
- The Thing About Jellyfish
- Things Not Seen
- 33 Minutes
- Thirst
- This Journal Belongs to Ratchet
- This Side of Home
- Threads
- The Tiger Rising >
- A Time to Dance
- The Total Tragedy of a Girl Named Hamlet
- The Trials of Apollo (series)
- The True Meaning of Smekday
- Tumbling
- Turning 15 on the Road to Freedom
- The Two Princesses of Bamarre
- Uglies
- Ultra
- Unbound
- Under a Painted Sky
- The Underneath
- Under the Egg
- Ungifted
- Unidentified Suburban Object
- The Unlikely Hero of Room 13B
- The Unwanteds
- Uprising
- Upside Down Magic
- The View from Saturday
- The Vigilante Poets of Selwyn Academy
- Vincent Shadow, Toy Inventor
- Waiting for Normal
- Wake Up Missing
- The War That Saved My Life
- We Are All Made of Molecules
- We Are Okay
- We Are Party People
- Wedgie & Gizmo
- The Wednesday Wars
- The Westing Game
- When You Trap a Tiger
- Where the Mountain Meets the Moon
- Where the Red Fern Grows
- A Whole Nother Story
- Wishtree
- The Witch of Blackbird Pond >
- Woods Runner
- Woof
- Wonder
- Words on Fire
- The World Ends in April
- A Wrinkle in Time
- A Year in the Life of a Total and Complete Genius
- You Bring the Distant Near
- Young Fu of the Upper Yangtze
- Zebra Forest
- Zen and the Art of Faking It
- Zoey and Sassafras
-
Book Topics - Categories
>
- Book Topics - Animals
- Book Topics - The Arts
- Book Topics - Careers
- Book Topics - Competitions
- Book Topics - Families
- Book Topics - Health
- Book Topics - Historical Events
- Book Topics - Journeys
- Book Topics - Legends, Myths, and Fairy Tales
- Book Topics - The Outdoors
- Book Topics - School
- Book Topics - Society, Community
- Book Topics - Sports
- Book Topics - Unexplained Phenomena
-
Book List by Theme
>
- Book Themes - Self
- Book Themes - Families
- Book Themes - Education
- Book Themes - Nature and the Environment
- Book Themes - Social Interactions
- Book Themes - Society
- Book Themes - Prejudice
- Book Themes - Overcoming Obstacles
- Book Themes - Integrity
- Book Themes - Miscellaneous
- Book Themes - Values and Conflicts
- Book List by Format
- Book List by Author
- Book List by Setting
- Book List by Genre >
- Book List by Grade Level >
- Middle School Book Talk Videos
- Book Series Lists >
- Award - Winning Books >
- Book Quizzes
- Book Buying Guide Lists
- Eight Great Books Lists >
- IB-PYP Book Lists
- Picture Books for Lessons >
-
Alphabetical List of Book Recommendations
>
-
Enrichment
- Enrichment Ideas
-
Chez Moi Math Problem Solving
>
- Week 1 Chez Moi Math Problem Solving
- Week 2 Chez Moi Math Problem Solving
- Week 3 Chez Moi Math Problem Solving
- Week 4 Chez Moi Math Problem Solving
- Week 5 Chez Moi Math Problem Solving
- Week 6 Chez Moi Math Problem Solving
- Week 7 Chez Moi Math Problem Solving
- Week 8 Chez Moi Math Problem Solving
- Week 9 Chez Moi Math Problem Solving
- About
- Blog