|
For a long time, I've been 3D printer-adjacent; I've been fortunate to work alongside instructional technology and STEAM personnel on campuses, so I knew what 3D printers could do and encouraged students to use 3D printing as independent project formats, but I hadn't managed the machines or designs myself. I started at a new campus this year, and I knew I didn't want the brand new 3D printer to be sitting in a closet, so I went to some hands-on training, built a lesson, and jumped in with both feet. I hope this post can offer some tips and learning to others out there in similar situations! The Lesson I worked with 15 different 8th grade ELA classes in the library - about half were advanced, and half were "on level." There were about 20 - 30 students per class, and I have nine tables with 4 chairs each in the teaching/presentation area of my library. I started with a read-aloud that was only loosely connected to monsters (I'll take any excuse to share a fun picture book): Alex Willan's Unicorns Are the Worst. The text talks about some characteristics of unicorns, as well as goblins and dragons, so we would be focusing on designing our own original monsters. 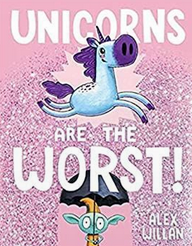
0 Comments
As the former librarian at an elementary STEAM campus, I was always looking for useful read-aloud books to highlight books that illustrate creativity productivity. Whether it's the idea generation or research stage, building and refining prototypes, collaborating and exchanging feedback, or persisting in the face of struggles, there are a lot of skills involved with STEAM education and makerspaces. Here are a few titles that might be useful for classrooms, campuses, and families who want to explore maker concepts. 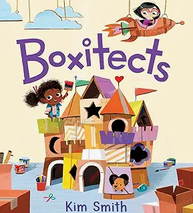 Boxitects by Kim Smith Everyone who's ever known the joy of a group project can connect to this story, especially if you're a big ideas person who likes to be in charge. When you already have a vision about what something will look like, it can be hard to acknowledge other good ideas, much less incorporate them into your own work. This story respects and names this reality so that when team conflicts arise, participants can refer back to the story discussion for solutions and strategies. 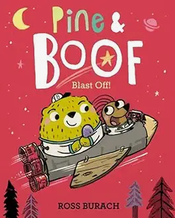 Pine and Boof Blast Off by Ross Burach A celebration of imagination and making that is sure to appeal to young students - and more than a few older ones, too. If you like Pine and Boof, there are more books in this series. And if you teach K-4 kids and haven't done any read-alouds by Ross Burach, run to your nearest library for guaranteed laughs. 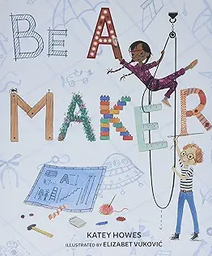 Be a Maker by Katey Howes The whole book is an invitation to engage in the creative process. It might be particularly helpful to read before brainstorming possible projects or building ideas. 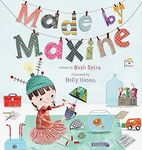 Made by Maxine by Ruth Spiro
Maxine is shown trying invent something that will allow her pet goldfish to participate in the pet parade. Her persistence and clever re-purposing of recycled objects offer plenty of inspiration for additional projects. I've worked in a STEAM-centered elementary school library and a traditional middle school campus library, and I often see questions from librarians about which materials to buy to support makerspace initiatives, so this post is my response to that question. Scheduling Time With a flexible elementary schedule, I was able to schedule weekly class visits for library read-alouds and check-out, and reserve either full or half-days for flex maker visits each week. These could be based on teacher sign-ups, where they bring the whole class, or it could involve a few students from multiple classes visiting without their teachers. On a fixed schedule, there would be more time for each class to explore the maker stations, but without time between classes, it's more difficult to change out the stations and materials if very young and older elementary classes are back to back. My favorite thing in elementary school was student-led maker workshops, where older students led select activities, and a whole class of younger students visited with the classroom teacher, who broke the students into small groups based on interest to visit those maker stations. It was a great experience for a very large school, because it helped students get to know each other, it built confidence and leadership capacity in older students, and it exposed younger students to a variety of different types of activities, so that when they encountered them as library stations, they were better able to use those materials. However, this was complicated to schedule, as it involved pulling the older students and the younger students at times when their classes were available, and emailing reminders to multiple people, and setting up lots of different materials in advance. In middle school, stations do not have to change drastically, because 6th graders can access the same equipment 8th graders can access (unlike in elementary school, where some supplies need to be changed out for 1st graders vs. 4th graders, for example). So maker stations can be out for library classes (it works really well leading up to a vacation break when students and teachers are exhausted and overwhelmed with demands), or part of a library club activity, reading challenge celebration, or before or after school in the library. What to Include in Maker Stations
Logistically, I prefer to have too many stations per class, because I would always rather have extra room to spread people out than have too many people at a station, which means some people are waiting to use materials and have time to get off-task. I want everyone to be creating and busy, so having many options spread out across the space is helpful. It is okay to repeat stations around the room, but if I plan to rotate groups left to right, I make sure I don't have the same materials at stations right next to each other so students get to try different things. Generally, middle school students can be free to visit any station and move from place to place as needed, with three guidelines: 1) All materials at the station stay there, on the table at that station 2) Only 4 people per station at a time 3) If you move to a different station, clean up everything before you move I also walk whole classes through all of the station options (while they are seated away from the materials) before they choose where to start. This school year, I moved to a middle school library position, in a school with over 1100 students. I had to start over collecting materials and building capacity for makerspace stations, but since older students typically have better fine motor skills and are generally more independent, I've been able to get it up and running faster than I initially could in an elementary school.. Take a look at my earlier post about using Perler beads for an overview about what to buy and why to use these in the library. 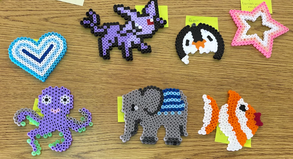 Finished student Perler bead projects This time, I didn't have as many parent volunteers wanting to hang around to help iron the projects, and I wasn't quite ready to turn it over to student volunteers, so I did the ironing myself. I wanted to add a few notes of advice to anybody out there who wants to add this to your library space. It might seem like a lot of detail, but if it saves you some trial and error, that's excellent. I introduced Perler beads as a maker option in the library this year, and I wanted to share some advice I wish I'd known before I started. 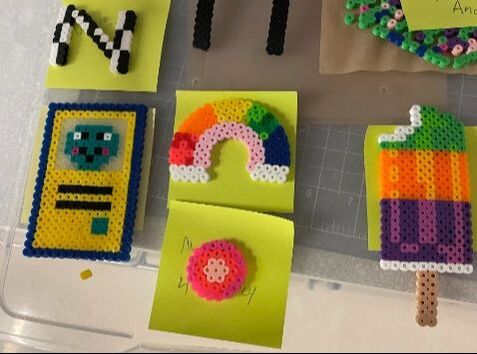 Examples of finished Perler bead designs Perler beads, or fuse beads, are very small cylinders that can be arranged on plastic peg boards. You can use an iron or heat press on the design to melt the beads together, and then you have a 3D design that can serve as a nameplate, bookmark, earrings, key chain, or decoration. I've seen this in secondary libraries (and I got a useful start from Kelsey Bogan's high school library blog tips), and I wanted to bring it to my elementary library, too. I wanted to have this as an ongoing station that's available all the time, but I see 800 students, ages 4 - 12 each week -- I would almost certainly have beads everywhere--so I needed more of a guided system. If you want to try them in your library or classroom, here's how I got started: Scheduling the Makerspace Time I started with an after-school craft club, made up of about thirty 3rd, 4th, and 5th graders, who stayed for about 45 minutes after school. We did origami, rubber band bracelets, washi tape cards, and Perler beads. It was good to test drive the projects with a motivated group of students before I rolled it out to library classes. For our makerspace workshop days, full classes came in, and students could choose from a variety of table station activities, including Perler beads. Since we have such a large school, we needed a lot of materials prepped and available for back-to-back classes. Some crafts were ready when students left the library, but Perler bead designs have to be ironed (and cooled). I couldn't do that while I was also supervising classes, but having volunteers on hand to iron them right away would have been really helpful. As the designs stack up, all those peg boards are used up, and space becomes limited to safely store the (relatively fragile) un-ironed projects. I used sticky notes for student names and stashed them underneath the peg boards so that when I ironed them later, I knew which design belonged to which student. 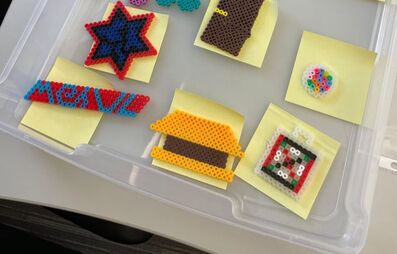 Sticky notes under finished designs help keep track of student names |
Jamie Wright
I've had the privilege of working with hundreds of students and families in IA, CT, NC, MO, TX, and Canada. I love being a teacher-librarian! Categories
All
Archives
May 2024
|
- Home
-
Book Recommendations
-
Alphabetical List of Book Recommendations
>
- Abby Spencer Goes to Bollywood
- Absolutely Almost
- The Absolutely True Diary of a Part-Time Indian
- After Ever After
- After Iris
- Airborn >
- Alex Rider - series
- All Fall Down
- All the Answers
- All the Broken Pieces
- All You Knead is Love
- Allegedly
- All's Faire in Middle School
- Amal Unbound
- Amazing Grace
- American Born Chinese
- Amina's Voice
- Among the Hidden - series
- Anger is a Gift
- Anne of Green Gables - series >
- Artemis Fowl - series
- Athlete vs. Mathlete
- Awkward
- The Bad Apple - Merits of Mischief
- Bad Princess: True Tales from Behind the Tiara
- Bamboo People
- Ban This Book
- Because of Mr. Terupt
- Bernice Buttman, Model Citizen
- Bionic
- The Black Pearl
- Blended
- Blue Jasmine
- Bomb: The Race to Make - and Steal - the World's Most Dangerous Weapon
- The Book of a Thousand Days
- Booked
- A Boy Called Bat
- Boys Without Names
- The Breadwinner Trilogy
- Breaking Stalin's Nose
- Bright
- Brown Girl Dreaming
- Bud, Not Buddy
- Bump
- The Cardturner
- Carry On
- Caterpillar Summer
- Catherine, Called Birdy >
- Charlie and the Chocolate Factory
- Chasing Secrets
- Chasing Vermeer
- Checked
- Chronicles of Prydain
- Chu Ju's House
- Circa Now
- Click
- Climbing the Stairs
- Code Name Verity - Series
- Code Talker
- Colin Fischer
- Come November
- Confetti Girl
- Count Me In
- Counting By 7s
- Courage for Beginners
- The Courage Test
- Crenshaw
- Criss Cross
- A Crooked Kind of Perfect
- Curveball: The Year I Lost My Grip
- Dangerous
- Dead End in Norvelt
- Dealing with Dragons
- Dear Mr. Henshaw
- A Diamond in the Desert
- The Dirt Diary - Series
- Divergent - Series
- Does My Head Look Big in This?
- Dog Man
- Dog Whisperer - Series
- Drive Me Crazy
- A Drop of Hope
- Drums, Girls, and Dangerous Pie
- Echo
- El Deafo
- Eleanor & Park
- Elephant Secret
- Eleven Birthdays
- Elijah of Buxton
- Ella Enchanted
- Ellen Outside the Lines
- Emma-Jean Lazarus Fell Out of a Tree
- Ender's Game
- Enna Burning
- Enola Holmes
- Eragon
- Escape from Mr. Lemoncello's Library
- Escape Under the Forever Sky
- Esperanza Rising >
- Eventown
- Ever
- Ever After High
- Every Shiny Thing
- Everything on a Waffle
- Fairest
- Falling Over Sideways
- The False Prince Series
- Fake Mustache
- Family Game Night and Other Catastrophes
- Famous Phonies
- Feathers
- Fever, 1793
- The Fifth Wave
- Fifty-Four Things Wrong with Gwendolyn Rogers
- The 57 Bus
- Finding Perfect
- The Fingertips of Duncan Dorfman
- The Fire, The Water, and Maudie McGinn
- The First Rule of Punk
- Fish in a Tree
- Flora and Ulysses
- Flygirl by Sherri Smith
- Focused
- Forget Me Not
- The Fourteenth Goldfish
- Framed!
- Frankie Sparks - Series
- Free Thaddeus!
- From the Mixed-up Files of Mrs. Basil E. Frankweiler >
- Front Desk
- Full Cicada Moon
- The Garden of My Imaan
- Garvey's Choice
- Geek Girl - Series
- The Genius Files >
- Ghost
- A Gift of Magic
- The Girl in the Well is Me
- Girl, Stolen
- The Girl Who Could Fly
- The Girl Who Drank the Moon
- The Girl Who Threw Butterflies
- The Giver
- Go Big or Go Home
- Gold Medal Summer
- Golden Girl
- The Goldfish Boy
- Good Dog
- A Good Kind of Trouble
- The Goose Girl
- Gracefully Grayson
- Grandmaster
- The Graveyard Book
- Greetings from Witness Protection
- Hachiko Waits
- The Handbook for Dragon Slayers
- A Handful of Stars
- Half a World Away
- Hamster Princess - Series
- Harry Potter - Series
- Hatchet
- Her Own Two Feet
- Hero
- The Heroes of Olympus Series
- Hey, Kiddo
- The Higher Power of Lucky
- Holes >
- Home of the Brave
- The Homework Machine
- The Homework Strike
- The Honest Truth
- Hope Was Here
- The House That Lou Built
- How to Ditch Your Fairy
- How to Steal a Dog
- How to Train Your Dragon Series
- The Hundred Dresses
- The Hunger Games Series
- I Am a Genius of Unspeakable Evil and I Want to Be Your Class President
- I Am Not Your Perfect Mexican Daughter
- I Have a Bad Feeling About This
- I Am Number Four
- I Heart Band
- I Kill the Mockingbird
- I Survived . . . Series
- I Will Always Write Back
- Ida B
- If I Were You
- If a Tree Falls at Lunch Period
- In the Shadow of the Sun
- Incommunicado
- Inside Out and Back Again
- Insignificant Events in the Life of a Cactus
- The Invention of Hugo Cabret
- Invisible World
- It's Raining Cupcakes
- James and the Giant Peach
- Jefferson's Sons
- Karma Khullar's Mustache
- Keeping Corner
- The Kidney Hypothetical
- The Kite Fighters >
- Knock Out
- Lasagna Means I Love You
- The Last Book in the Universe
- The Last Shot: Mystery at the Final Four
- Left Out
- Legend
- The Lemonade War
- Liberty Porter, First Daughter
- Lies We Tell Ourselves
- Lights, Camera, Disaster
- Lily and Dunkin
- The Limit
- The Lions of Little Rock
- Listen, Slowly
- Listening for Lions
- Little House - Series
- Little Miss Evil
- A Little Princess
- Locomotion >
- The Long Ride
- A Long Walk to Water
- Long Way Down
- Losers Take All
- The Lost Girl
- Lost in the Sun
- Love That Dog
- Lunch Money
- The Magician's Elephant
- Maniac Magee
- Mascot
- Masterpiece >
- A Match Made in Mehendi
- Matched Trilogy
- Maus
- Maybe a Fox
- Maybe He Just Likes You
- The Maze Runner
- Me and Marvin Gardens
- Medusa Jones
- A Million Shades of Gray
- Minnie McClary Speaks Her Mind
- The Miraculous Journey of Edward Tulane
- The Miscalculations of Lightning Girl
- Mockingbird
- Morning Girl
- Morning Star
- Mrs. Frisby and the Rats of NIMH >
- My Basmati Bat Mitzvah
- My Life in Pink and Green
- My Life with the Liars
- The Mysterious Benedict Society
- Nathan Hale's Hazardous Tales
- Neil Flambe
- The Neptune Project
- Nerd Camp
- NERDS
- New Kid
- The Next Great Paulie Fink
- The Night Diary
- A Night Divided
- Ninth Ward
- No Summit Out of Sight
- No Talking
- Not If I Can Help It
- Notes from an Accidental Band Geek
- Nothing But the Truth
- Number the Stars >
- OCDaniel
- Olive's Ocean
- On My Honor >
- On the Wings of Heroes
- The One and Only Ivan
- One Came Home
- One Crazy Summer
- One Half from the East
- One Jar of Magic
- One of the Survivors
- One of Us is Lying
- One Small Step
- One True Way
- Orbiting Jupiter
- The Other Half of My Heart
- The Other Side of Truth
- Out of My Mind
- Out of the Dust
- Outrun the Moon
- Paint the Wind >
- The Paper Cowboy
- Paperboy
- Peak
- Percy Jackson and the Olympians
- The Phantom Tollbooth
- Piecing Me Together
- Pippi Longstocking
- Planet Earth is Blue
- The Player King
- The Porcupine of Truth
- Posted
- The President's Daughter (series)
- Princess Academy
- The Princess in Black
- The Pros of Cons
- The Puttermans Are in the House
- The Puzzling World of Winston Breen
- Rachel Spinelli Punched Me in the Face
- Rancho Rosetta Series
- Real Friends
- Rebel McKenzie
- The Red Pencil
- Red Thread Sisters
- Red, White, and Whole
- Reluctant Journal of Henry K. Larsen
- The Report Card
- Rescued
- Restart
- Revolution is Not a Dinner Party
- River Secrets
- Roll With It
- Roller Girl
- Romeo Blue
- Roses and Radicals
- Ruby on the Outside
- Rules
- Rules for Stealing Stars
- The Running Dream
- Sadako and the Thousand Paper Cranes
- Sahara Special
- Salt and Sugar
- Salt to the Sea
- Same Sun Here
- Samurai Rising
- Sarah, Plain and Tall
- Sarai and The Meaning of Awesome
- Saraswati's Way
- Sassy - series
- Save Me a Seat
- School of Fear
- The School for Good and Evil
- Schooled
- The Schwa Was Here
- A Season of Daring Greatly
- The Secret Diary of Lydia Bennet
- Secret Keeper
- The Secret School
- The Seventh Wish
- Shakespeare's Secret
- Shooting Kabul
- Sideways Stories from Wayside School
- The Sign of the Beaver
- Simon Sort of Says
- Sing Down the Moon
- A Single Shard >
- The Sisters Grimm
- Six Impossible Things
- Slider
- Sliding Into Home
- Smile
- The Smile
- A Snicker of Magic
- Soar
- Some Places More Than Others
- Something Rotten: A Fresh Look at Roadkill
- Song for a Whale
- Space Case
- Sparrow
- Speak
- Speechless
- Spin the Golden Light Bulb
- Stargazing
- Stargirl >
- Star Wars: Jedi Academy
- Stef Soto, Taco Queen
- Stink and the Incredible, Super Galactic Jawbreaker
- Stone Fox
- Story Thieves
- The Strange Case of Origami Yoda
- Stuck on Earth
- The Summer I Saved the World in 65 Days
- Surviving the Applewhites
- Survival Strategies of the Almost Brave
- The Swap
- The Sweetest Sound
- The Tail of Emily Windsnap >
- Take Me to the River
- The Tale of Despereaux
- A Tangle of Knots
- The Tapper Twins - series
- Tasting the Sky
- That Thing About Bollywood
- TBH This is So Awkward
- The Thief
- The Thing About Jellyfish
- Things Not Seen
- 33 Minutes
- Thirst
- This Journal Belongs to Ratchet
- This Side of Home
- Threads
- The Tiger Rising >
- A Time to Dance
- The Total Tragedy of a Girl Named Hamlet
- The Trials of Apollo (series)
- The True Meaning of Smekday
- Tumbling
- Turning 15 on the Road to Freedom
- The Two Princesses of Bamarre
- Uglies
- Ultra
- Unbound
- Under a Painted Sky
- The Underneath
- Under the Egg
- Ungifted
- Unidentified Suburban Object
- The Unlikely Hero of Room 13B
- The Unwanteds
- Uprising
- Upside Down Magic
- The View from Saturday
- The Vigilante Poets of Selwyn Academy
- Vincent Shadow, Toy Inventor
- Waiting for Normal
- Wake Up Missing
- The War That Saved My Life
- We Are All Made of Molecules
- We Are Okay
- We Are Party People
- Wedgie & Gizmo
- The Wednesday Wars
- The Westing Game
- When You Trap a Tiger
- Where the Mountain Meets the Moon
- Where the Red Fern Grows
- A Whole Nother Story
- Wishtree
- The Witch of Blackbird Pond >
- Woods Runner
- Woof
- Wonder
- Words on Fire
- The World Ends in April
- A Wrinkle in Time
- A Year in the Life of a Total and Complete Genius
- You Bring the Distant Near
- Young Fu of the Upper Yangtze
- Zebra Forest
- Zen and the Art of Faking It
- Zoey and Sassafras
-
Book Topics - Categories
>
- Book Topics - Animals
- Book Topics - The Arts
- Book Topics - Careers
- Book Topics - Competitions
- Book Topics - Families
- Book Topics - Health
- Book Topics - Historical Events
- Book Topics - Journeys
- Book Topics - Legends, Myths, and Fairy Tales
- Book Topics - The Outdoors
- Book Topics - School
- Book Topics - Society, Community
- Book Topics - Sports
- Book Topics - Unexplained Phenomena
-
Book List by Theme
>
- Book Themes - Self
- Book Themes - Families
- Book Themes - Education
- Book Themes - Nature and the Environment
- Book Themes - Social Interactions
- Book Themes - Society
- Book Themes - Prejudice
- Book Themes - Overcoming Obstacles
- Book Themes - Integrity
- Book Themes - Miscellaneous
- Book Themes - Values and Conflicts
- Book List by Format
- Book List by Author
- Book List by Setting
- Book List by Genre >
- Book List by Grade Level >
- Middle School Book Talk Videos
- Book Series Lists >
- Award - Winning Books >
- Book Quizzes
- Book Buying Guide Lists
- Eight Great Books Lists >
- IB-PYP Book Lists
- Picture Books for Lessons >
-
Alphabetical List of Book Recommendations
>
-
Enrichment
- Enrichment Ideas
-
Chez Moi Math Problem Solving
>
- Week 1 Chez Moi Math Problem Solving
- Week 2 Chez Moi Math Problem Solving
- Week 3 Chez Moi Math Problem Solving
- Week 4 Chez Moi Math Problem Solving
- Week 5 Chez Moi Math Problem Solving
- Week 6 Chez Moi Math Problem Solving
- Week 7 Chez Moi Math Problem Solving
- Week 8 Chez Moi Math Problem Solving
- Week 9 Chez Moi Math Problem Solving
- About
- Blog
 RSS Feed
© 2017 - 2024 - Ideas for Learners by Jamie Wright
|
|
- Home
-
Book Recommendations
-
Alphabetical List of Book Recommendations
>
- Abby Spencer Goes to Bollywood
- Absolutely Almost
- The Absolutely True Diary of a Part-Time Indian
- After Ever After
- After Iris
- Airborn >
- Alex Rider - series
- All Fall Down
- All the Answers
- All the Broken Pieces
- All You Knead is Love
- Allegedly
- All's Faire in Middle School
- Amal Unbound
- Amazing Grace
- American Born Chinese
- Amina's Voice
- Among the Hidden - series
- Anger is a Gift
- Anne of Green Gables - series >
- Artemis Fowl - series
- Athlete vs. Mathlete
- Awkward
- The Bad Apple - Merits of Mischief
- Bad Princess: True Tales from Behind the Tiara
- Bamboo People
- Ban This Book
- Because of Mr. Terupt
- Bernice Buttman, Model Citizen
- Bionic
- The Black Pearl
- Blended
- Blue Jasmine
- Bomb: The Race to Make - and Steal - the World's Most Dangerous Weapon
- The Book of a Thousand Days
- Booked
- A Boy Called Bat
- Boys Without Names
- The Breadwinner Trilogy
- Breaking Stalin's Nose
- Bright
- Brown Girl Dreaming
- Bud, Not Buddy
- Bump
- The Cardturner
- Carry On
- Caterpillar Summer
- Catherine, Called Birdy >
- Charlie and the Chocolate Factory
- Chasing Secrets
- Chasing Vermeer
- Checked
- Chronicles of Prydain
- Chu Ju's House
- Circa Now
- Click
- Climbing the Stairs
- Code Name Verity - Series
- Code Talker
- Colin Fischer
- Come November
- Confetti Girl
- Count Me In
- Counting By 7s
- Courage for Beginners
- The Courage Test
- Crenshaw
- Criss Cross
- A Crooked Kind of Perfect
- Curveball: The Year I Lost My Grip
- Dangerous
- Dead End in Norvelt
- Dealing with Dragons
- Dear Mr. Henshaw
- A Diamond in the Desert
- The Dirt Diary - Series
- Divergent - Series
- Does My Head Look Big in This?
- Dog Man
- Dog Whisperer - Series
- Drive Me Crazy
- A Drop of Hope
- Drums, Girls, and Dangerous Pie
- Echo
- El Deafo
- Eleanor & Park
- Elephant Secret
- Eleven Birthdays
- Elijah of Buxton
- Ella Enchanted
- Ellen Outside the Lines
- Emma-Jean Lazarus Fell Out of a Tree
- Ender's Game
- Enna Burning
- Enola Holmes
- Eragon
- Escape from Mr. Lemoncello's Library
- Escape Under the Forever Sky
- Esperanza Rising >
- Eventown
- Ever
- Ever After High
- Every Shiny Thing
- Everything on a Waffle
- Fairest
- Falling Over Sideways
- The False Prince Series
- Fake Mustache
- Family Game Night and Other Catastrophes
- Famous Phonies
- Feathers
- Fever, 1793
- The Fifth Wave
- Fifty-Four Things Wrong with Gwendolyn Rogers
- The 57 Bus
- Finding Perfect
- The Fingertips of Duncan Dorfman
- The Fire, The Water, and Maudie McGinn
- The First Rule of Punk
- Fish in a Tree
- Flora and Ulysses
- Flygirl by Sherri Smith
- Focused
- Forget Me Not
- The Fourteenth Goldfish
- Framed!
- Frankie Sparks - Series
- Free Thaddeus!
- From the Mixed-up Files of Mrs. Basil E. Frankweiler >
- Front Desk
- Full Cicada Moon
- The Garden of My Imaan
- Garvey's Choice
- Geek Girl - Series
- The Genius Files >
- Ghost
- A Gift of Magic
- The Girl in the Well is Me
- Girl, Stolen
- The Girl Who Could Fly
- The Girl Who Drank the Moon
- The Girl Who Threw Butterflies
- The Giver
- Go Big or Go Home
- Gold Medal Summer
- Golden Girl
- The Goldfish Boy
- Good Dog
- A Good Kind of Trouble
- The Goose Girl
- Gracefully Grayson
- Grandmaster
- The Graveyard Book
- Greetings from Witness Protection
- Hachiko Waits
- The Handbook for Dragon Slayers
- A Handful of Stars
- Half a World Away
- Hamster Princess - Series
- Harry Potter - Series
- Hatchet
- Her Own Two Feet
- Hero
- The Heroes of Olympus Series
- Hey, Kiddo
- The Higher Power of Lucky
- Holes >
- Home of the Brave
- The Homework Machine
- The Homework Strike
- The Honest Truth
- Hope Was Here
- The House That Lou Built
- How to Ditch Your Fairy
- How to Steal a Dog
- How to Train Your Dragon Series
- The Hundred Dresses
- The Hunger Games Series
- I Am a Genius of Unspeakable Evil and I Want to Be Your Class President
- I Am Not Your Perfect Mexican Daughter
- I Have a Bad Feeling About This
- I Am Number Four
- I Heart Band
- I Kill the Mockingbird
- I Survived . . . Series
- I Will Always Write Back
- Ida B
- If I Were You
- If a Tree Falls at Lunch Period
- In the Shadow of the Sun
- Incommunicado
- Inside Out and Back Again
- Insignificant Events in the Life of a Cactus
- The Invention of Hugo Cabret
- Invisible World
- It's Raining Cupcakes
- James and the Giant Peach
- Jefferson's Sons
- Karma Khullar's Mustache
- Keeping Corner
- The Kidney Hypothetical
- The Kite Fighters >
- Knock Out
- Lasagna Means I Love You
- The Last Book in the Universe
- The Last Shot: Mystery at the Final Four
- Left Out
- Legend
- The Lemonade War
- Liberty Porter, First Daughter
- Lies We Tell Ourselves
- Lights, Camera, Disaster
- Lily and Dunkin
- The Limit
- The Lions of Little Rock
- Listen, Slowly
- Listening for Lions
- Little House - Series
- Little Miss Evil
- A Little Princess
- Locomotion >
- The Long Ride
- A Long Walk to Water
- Long Way Down
- Losers Take All
- The Lost Girl
- Lost in the Sun
- Love That Dog
- Lunch Money
- The Magician's Elephant
- Maniac Magee
- Mascot
- Masterpiece >
- A Match Made in Mehendi
- Matched Trilogy
- Maus
- Maybe a Fox
- Maybe He Just Likes You
- The Maze Runner
- Me and Marvin Gardens
- Medusa Jones
- A Million Shades of Gray
- Minnie McClary Speaks Her Mind
- The Miraculous Journey of Edward Tulane
- The Miscalculations of Lightning Girl
- Mockingbird
- Morning Girl
- Morning Star
- Mrs. Frisby and the Rats of NIMH >
- My Basmati Bat Mitzvah
- My Life in Pink and Green
- My Life with the Liars
- The Mysterious Benedict Society
- Nathan Hale's Hazardous Tales
- Neil Flambe
- The Neptune Project
- Nerd Camp
- NERDS
- New Kid
- The Next Great Paulie Fink
- The Night Diary
- A Night Divided
- Ninth Ward
- No Summit Out of Sight
- No Talking
- Not If I Can Help It
- Notes from an Accidental Band Geek
- Nothing But the Truth
- Number the Stars >
- OCDaniel
- Olive's Ocean
- On My Honor >
- On the Wings of Heroes
- The One and Only Ivan
- One Came Home
- One Crazy Summer
- One Half from the East
- One Jar of Magic
- One of the Survivors
- One of Us is Lying
- One Small Step
- One True Way
- Orbiting Jupiter
- The Other Half of My Heart
- The Other Side of Truth
- Out of My Mind
- Out of the Dust
- Outrun the Moon
- Paint the Wind >
- The Paper Cowboy
- Paperboy
- Peak
- Percy Jackson and the Olympians
- The Phantom Tollbooth
- Piecing Me Together
- Pippi Longstocking
- Planet Earth is Blue
- The Player King
- The Porcupine of Truth
- Posted
- The President's Daughter (series)
- Princess Academy
- The Princess in Black
- The Pros of Cons
- The Puttermans Are in the House
- The Puzzling World of Winston Breen
- Rachel Spinelli Punched Me in the Face
- Rancho Rosetta Series
- Real Friends
- Rebel McKenzie
- The Red Pencil
- Red Thread Sisters
- Red, White, and Whole
- Reluctant Journal of Henry K. Larsen
- The Report Card
- Rescued
- Restart
- Revolution is Not a Dinner Party
- River Secrets
- Roll With It
- Roller Girl
- Romeo Blue
- Roses and Radicals
- Ruby on the Outside
- Rules
- Rules for Stealing Stars
- The Running Dream
- Sadako and the Thousand Paper Cranes
- Sahara Special
- Salt and Sugar
- Salt to the Sea
- Same Sun Here
- Samurai Rising
- Sarah, Plain and Tall
- Sarai and The Meaning of Awesome
- Saraswati's Way
- Sassy - series
- Save Me a Seat
- School of Fear
- The School for Good and Evil
- Schooled
- The Schwa Was Here
- A Season of Daring Greatly
- The Secret Diary of Lydia Bennet
- Secret Keeper
- The Secret School
- The Seventh Wish
- Shakespeare's Secret
- Shooting Kabul
- Sideways Stories from Wayside School
- The Sign of the Beaver
- Simon Sort of Says
- Sing Down the Moon
- A Single Shard >
- The Sisters Grimm
- Six Impossible Things
- Slider
- Sliding Into Home
- Smile
- The Smile
- A Snicker of Magic
- Soar
- Some Places More Than Others
- Something Rotten: A Fresh Look at Roadkill
- Song for a Whale
- Space Case
- Sparrow
- Speak
- Speechless
- Spin the Golden Light Bulb
- Stargazing
- Stargirl >
- Star Wars: Jedi Academy
- Stef Soto, Taco Queen
- Stink and the Incredible, Super Galactic Jawbreaker
- Stone Fox
- Story Thieves
- The Strange Case of Origami Yoda
- Stuck on Earth
- The Summer I Saved the World in 65 Days
- Surviving the Applewhites
- Survival Strategies of the Almost Brave
- The Swap
- The Sweetest Sound
- The Tail of Emily Windsnap >
- Take Me to the River
- The Tale of Despereaux
- A Tangle of Knots
- The Tapper Twins - series
- Tasting the Sky
- That Thing About Bollywood
- TBH This is So Awkward
- The Thief
- The Thing About Jellyfish
- Things Not Seen
- 33 Minutes
- Thirst
- This Journal Belongs to Ratchet
- This Side of Home
- Threads
- The Tiger Rising >
- A Time to Dance
- The Total Tragedy of a Girl Named Hamlet
- The Trials of Apollo (series)
- The True Meaning of Smekday
- Tumbling
- Turning 15 on the Road to Freedom
- The Two Princesses of Bamarre
- Uglies
- Ultra
- Unbound
- Under a Painted Sky
- The Underneath
- Under the Egg
- Ungifted
- Unidentified Suburban Object
- The Unlikely Hero of Room 13B
- The Unwanteds
- Uprising
- Upside Down Magic
- The View from Saturday
- The Vigilante Poets of Selwyn Academy
- Vincent Shadow, Toy Inventor
- Waiting for Normal
- Wake Up Missing
- The War That Saved My Life
- We Are All Made of Molecules
- We Are Okay
- We Are Party People
- Wedgie & Gizmo
- The Wednesday Wars
- The Westing Game
- When You Trap a Tiger
- Where the Mountain Meets the Moon
- Where the Red Fern Grows
- A Whole Nother Story
- Wishtree
- The Witch of Blackbird Pond >
- Woods Runner
- Woof
- Wonder
- Words on Fire
- The World Ends in April
- A Wrinkle in Time
- A Year in the Life of a Total and Complete Genius
- You Bring the Distant Near
- Young Fu of the Upper Yangtze
- Zebra Forest
- Zen and the Art of Faking It
- Zoey and Sassafras
-
Book Topics - Categories
>
- Book Topics - Animals
- Book Topics - The Arts
- Book Topics - Careers
- Book Topics - Competitions
- Book Topics - Families
- Book Topics - Health
- Book Topics - Historical Events
- Book Topics - Journeys
- Book Topics - Legends, Myths, and Fairy Tales
- Book Topics - The Outdoors
- Book Topics - School
- Book Topics - Society, Community
- Book Topics - Sports
- Book Topics - Unexplained Phenomena
-
Book List by Theme
>
- Book Themes - Self
- Book Themes - Families
- Book Themes - Education
- Book Themes - Nature and the Environment
- Book Themes - Social Interactions
- Book Themes - Society
- Book Themes - Prejudice
- Book Themes - Overcoming Obstacles
- Book Themes - Integrity
- Book Themes - Miscellaneous
- Book Themes - Values and Conflicts
- Book List by Format
- Book List by Author
- Book List by Setting
- Book List by Genre >
- Book List by Grade Level >
- Middle School Book Talk Videos
- Book Series Lists >
- Award - Winning Books >
- Book Quizzes
- Book Buying Guide Lists
- Eight Great Books Lists >
- IB-PYP Book Lists
- Picture Books for Lessons >
-
Alphabetical List of Book Recommendations
>
-
Enrichment
- Enrichment Ideas
-
Chez Moi Math Problem Solving
>
- Week 1 Chez Moi Math Problem Solving
- Week 2 Chez Moi Math Problem Solving
- Week 3 Chez Moi Math Problem Solving
- Week 4 Chez Moi Math Problem Solving
- Week 5 Chez Moi Math Problem Solving
- Week 6 Chez Moi Math Problem Solving
- Week 7 Chez Moi Math Problem Solving
- Week 8 Chez Moi Math Problem Solving
- Week 9 Chez Moi Math Problem Solving
- About
- Blog